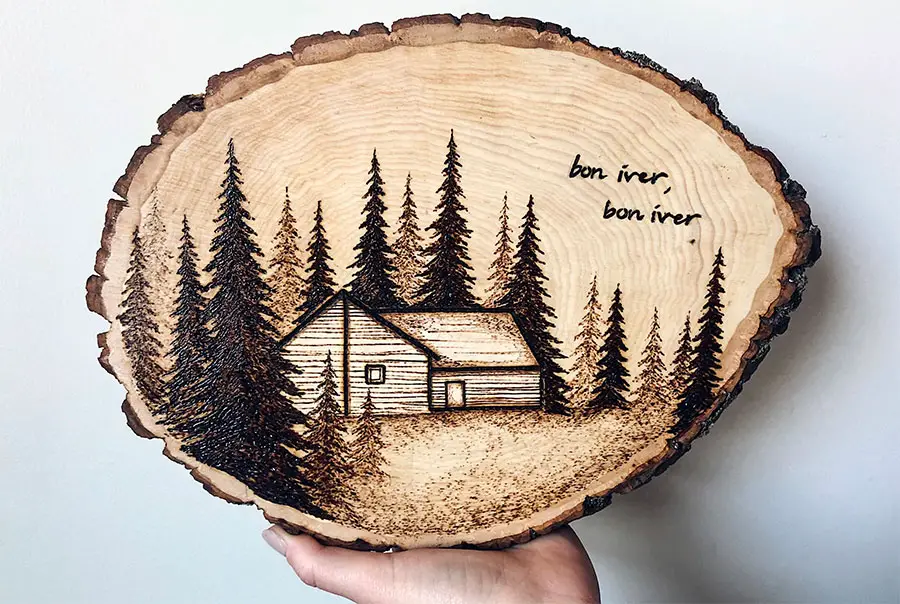
Wood burning, or pyrography, is a captivating art form that involves using heated tools to create intricate designs and patterns on wooden surfaces. For centuries, artists and hobbyists alike have been fascinated by the unique beauty of this ancient technique. If you’ve ever been curious about how to wood burn, you’ve come to the right place! This comprehensive guide is designed to walk beginners through the exciting process of wood burning, from selecting the right materials and tools to mastering basic techniques. So, let’s ignite your creativity and embark on a journey that will help you transform ordinary wood into stunning works of art!
Materials and Tools
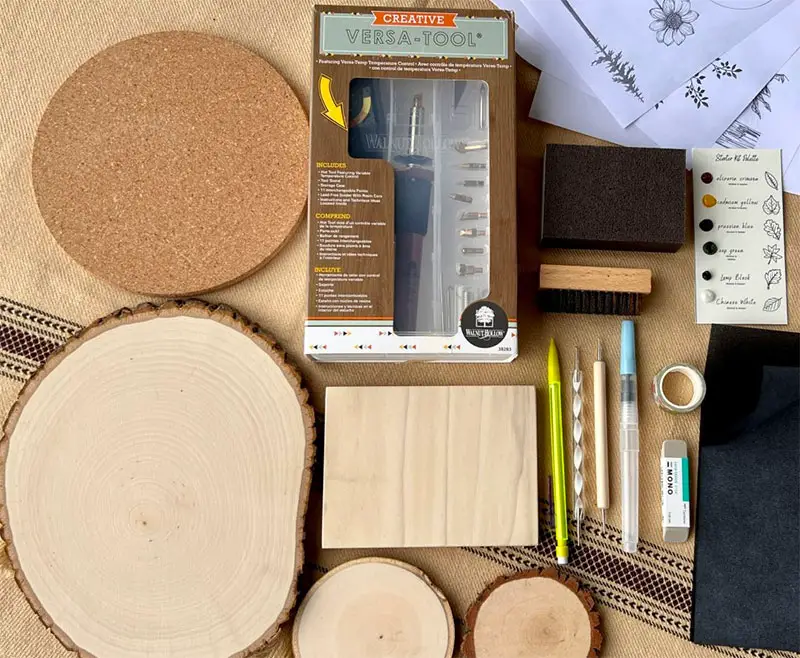
Woodburning pen
Types of woodburning pens:
There are two main types of woodburning pens: solid-point burners and wire-nib burners. Solid-point burners have a fixed, brass tip that heats up, while wire-nib burners use interchangeable wire tips that offer greater flexibility and control. Solid-point burners are generally more affordable and beginner-friendly, but wire-nib burners provide a wider range of tip options and more precise temperature control.
Features to consider when choosing a pen:
When selecting a woodburning pen, consider the following features: adjustable temperature controls, comfortable grip, quick heating and cooling, and a variety of tip options. Having adjustable temperature controls allows you to work with different wood types and techniques, while a comfortable grip ensures you can work for longer periods without fatigue. Quick heating and cooling make it easier to switch between tips, and a variety of tips helps you achieve different effects in your designs.
Wood surfaces
Suitable types of wood for wood burning:
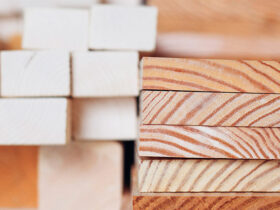
The best woods for wood burning are softwoods with minimal grain, such as basswood, pine, and poplar. These woods are easier to burn and allow for more precise designs. Avoid hardwoods with heavy grain or resin, as they can be difficult to burn evenly and may produce inconsistent results.
Preparing the wood surface:
Before starting your wood burning project, ensure the wood surface is clean, smooth, and free of any knots or imperfections. Use sandpaper to smooth the surface, starting with a coarser grit (e.g., 100 grit) and progressing to a finer grit (e.g., 220 grit) for a polished finish. Wipe the surface clean with a damp cloth to remove any dust.
Additional tools and materials
- Pencils and erasers for sketching: Use a pencil and eraser to sketch your design on paper before transferring it to the wood. This allows you to make adjustments and refine your design before committing to the wood burning process.
- Carbon paper or tracing paper: To transfer your design onto the wood surface, you can use carbon paper or tracing paper. Place the carbon or tracing paper between your sketch and the wood surface, and trace over your design with a pencil or stylus, applying even pressure to ensure a clear transfer.
- Sandpaper: As mentioned earlier, sandpaper is essential for preparing the wood surface. It can also be used to gently remove any mistakes or imperfections after the wood burning process.
- Safety gear: To ensure a safe wood burning experience, wear heat-resistant gloves, a mask to protect against fumes, and work in a well-ventilated area. This will help minimize the risk of injury and exposure to potentially harmful fumes.
Wood Burning Basics
Setting up your workspace
Ensuring proper ventilation
Proper ventilation is crucial when working with wood burning, as the process generates fumes that can be harmful if inhaled. Set up your workspace in a well-ventilated area, preferably near an open window or with a fan that can help disperse fumes. Make sure your workspace is free from flammable materials and clutter, as heated tools can pose a fire hazard.
Organizing tools and materials
Keep your tools and materials organized and within easy reach. This includes your woodburning pen, tips, wood surface, pencils, carbon paper or tracing paper, sandpaper, and safety gear. An organized workspace not only helps you work more efficiently but also reduces the risk of accidents.
Understanding temperature control
Adjusting the temperature for different techniques
Different wood burning techniques require different temperature settings. Line work and fine details usually require lower temperatures, while shading, texturing, and stippling often need higher temperatures. Experiment with your woodburning pen’s temperature controls to find the ideal settings for your chosen techniques.
Tips for avoiding overheating
Overheating can damage your woodburning pen or the wood surface. To prevent overheating, allow your pen to heat up gradually, starting at a lower temperature and slowly increasing it as needed. Also, give your pen periodic breaks to cool down and avoid prolonged contact with the wood surface.
Familiarizing yourself with different wood burning techniques
Line work
Line work is the foundation of wood burning and involves creating outlines and details using thin, continuous lines. To achieve crisp, clean lines, use a fine or medium tip and maintain consistent pressure as you guide the pen along your design.
Shading
Shading adds depth and dimension to your wood burning designs by creating gradients and shadows. You can achieve shading by adjusting the temperature of your pen and varying the pressure you apply to the wood. Experiment with different tips and techniques, such as cross-hatching or stippling, to create a range of shading effects.
Texturing
Texturing adds visual interest and complexity to your designs by incorporating patterns and surface effects. Use a variety of tips and techniques, such as dots, dashes, and zigzags, to create unique textures. Experiment with different temperature settings and pressure levels to achieve a range of textural effects.
Stippling
Stippling involves creating a pattern of small dots to add shading and texture to your wood burning designs. Use a fine or medium tip and apply light pressure to create tiny, evenly spaced dots. Vary the size and spacing of your dots to achieve different shading effects and add depth to your design.
Adding a touch of color to your wood burning art can create a stunning effect. One way to achieve this is by using watercolors on wood. With their translucent quality, watercolors can complement the burnt design, highlighting the natural beauty of the wood grain while adding a subtle pop of color.
Step-by-Step Guide: How to Wood Burn
1. Creating a design
- Sketching your design on paper: Begin by sketching your design on paper, refining it until you’re satisfied with the result. This step allows you to make adjustments and perfect your design before transferring it to the wood surface.
- Transferring the design to the wood surface: Once your design is ready, use carbon paper or tracing paper to transfer it onto the prepared wood surface. Place the carbon or tracing paper between your sketch and the wood, and trace over your design with a pencil or stylus, applying even pressure to ensure a clear transfer.
2. Preparing the woodburning pen
- Choosing the right tip: Select the appropriate tip for your woodburning pen based on the techniques you plan to use in your project (e.g., line work, shading, texturing, or stippling). Keep in mind that different tips provide varying effects, so experiment to find the best one for your needs.
- Heating the pen: Plug in your woodburning pen and allow it to heat up gradually, starting at a lower temperature and slowly increasing it as needed. Be sure to give the pen enough time to reach the desired temperature before beginning your project.
3. Wood burning process
- Outlining the design: Start by outlining your design on the wood surface, using a steady hand and consistent pressure to create clean, precise lines. Work from one side of the design to the other, ensuring that you don’t accidentally smudge any lines as you progress.
- Filling in the design with shading, texturing, or stippling: Once your outline is complete, fill in your design using your chosen techniques, such as shading, texturing, or stippling. Experiment with different temperature settings, pressure levels, and tips to achieve the desired effects in your design.
- Making any necessary adjustments or corrections: If you notice any mistakes or imperfections, use sandpaper to gently remove them or adjust your design as needed. Be cautious not to over-sand, as it can damage the wood surface.
4. Finishing your project
- Cooling the woodburning pen: After completing your design, allow the woodburning pen to cool down before changing tips or storing it. Never touch the hot tip directly, and use a heat-resistant surface to rest the pen on while it cools.
- Sanding the wood surface, if necessary: If your project requires any additional sanding, use fine-grit sandpaper to smooth out the surface and remove any residual imperfections. Be gentle and work in the direction of the wood grain to avoid damaging your design.
- Applying a finish (optional): To protect and enhance your wood burning project, consider applying a finish, such as a wood stain, oil, or varnish. Follow the manufacturer’s instructions for the specific product you choose, and allow the finish to dry completely before handling or displaying your project.
- Cleaning and maintaining your tools: To keep your woodburning pen and tips in good condition, clean them regularly by removing any built-up residue with a brass brush or fine steel wool. Store your pen and tips in a safe place, away from moisture and extreme temperatures, to prolong their lifespan.
Tips and Tricks for Successful Wood Burning
Practice on scrap wood
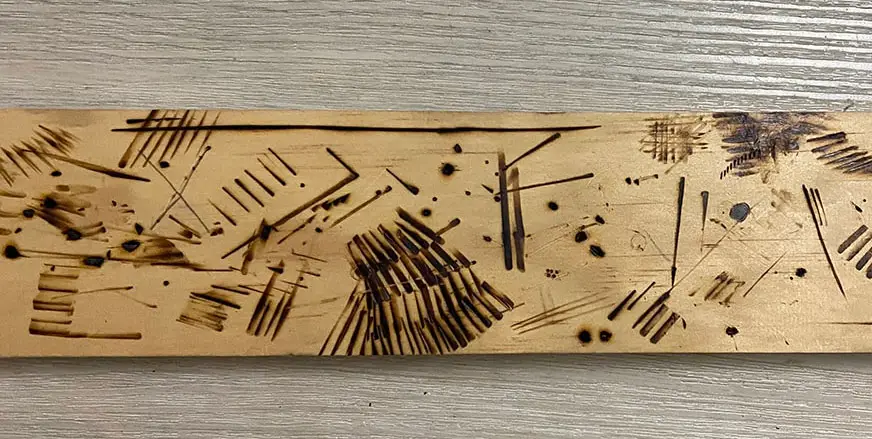
Before starting your actual project, practice your wood burning techniques on scrap wood pieces. This allows you to familiarize yourself with the tools, temperature settings, and techniques without the risk of damaging your final project.
Work slowly and patiently
Wood burning requires patience and precision. Take your time while working on your design, and avoid rushing through the process. Working slowly allows for better control and accuracy, ultimately leading to a more polished finished project.
Use a light touch to avoid burning too deeply
When using your woodburning pen, apply a light touch to avoid burning too deeply into the wood surface. Over-burning can cause irreversible damage to your project and make it difficult to achieve the desired effects. Adjust the pressure and temperature settings as needed to achieve the right balance.
Experiment with different techniques and tips
There are many different techniques and tips available for wood burning. Don’t be afraid to experiment and try new things, as this will help you develop your skills and find your unique style. Practice various techniques, such as line work, shading, texturing, and stippling, to discover what works best for your projects.
Always prioritize safety
Wood burning involves working with high temperatures and potentially harmful fumes, so it’s essential to prioritize safety. Ensure proper ventilation in your workspace, wear appropriate safety gear such as gloves and masks, and keep flammable materials away from your work area. Additionally, always allow your woodburning pen to cool down before changing tips or storing it to avoid burns or accidents.
FAQ
We understand that you may still have some questions about wood burning that haven’t been covered in the article. To address these queries and provide further guidance, we’ve compiled a list of frequently asked questions on wood burning, along with their answers.
What is the ideal wood burning pen temperature for beginners?
The ideal wood burning pen temperature for beginners depends on the specific pen and the type of wood being used. Generally, it’s best to start with a lower temperature setting, around 300-400°F, and gradually increase it as needed. This allows you to practice control and precision while minimizing the risk of burning the wood too deeply.
How can I choose the right woodburning pen tip for my project?
Choosing the right woodburning pen tip depends on the type of design and technique you plan to use. For fine lines and detailed work, opt for a sharp, pointed tip. For shading and filling in larger areas, use a flat or rounded tip. It’s a good idea to have a variety of tips available, so you can experiment with different techniques and find the ones that work best for your specific project.
Are there any alternatives to woodburning pens for beginners who want to try wood burning?
While woodburning pens are the most common tool for wood burning, beginners can also explore alternative methods such as using a soldering iron with a compatible tip. However, using a soldering iron may not provide the same level of control and precision as a dedicated woodburning pen. It’s important to practice caution and follow proper safety guidelines regardless of the tool you choose to use for wood burning.
How can I clean and maintain my woodburning pen tips for optimal performance?
To clean and maintain your woodburning pen tips, first ensure that the pen is unplugged and completely cooled down. Gently remove any built-up residue from the tip using fine sandpaper or a brass brush. Avoid using abrasive materials like steel wool, as they can damage the tip. Regular cleaning and maintenance will help ensure consistent performance and extend the life of your woodburning pen tips.
What are some common mistakes to avoid while wood burning?
Some common mistakes to avoid while wood burning include applying too much pressure or using a temperature that’s too high, which can result in burning the wood too deeply or creating unintended marks. Additionally, not practicing on scrap wood before starting a project and not properly preparing the wood surface can lead to poor results. Lastly, failing to prioritize safety measures such as proper ventilation and wearing protective gear can put you at risk.
Can wood burning be used on materials other than wood, such as leather or canvas?
Yes, wood burning can be used on materials other than wood, such as leather or canvas. However, the techniques and tools may differ, and you should exercise caution as these materials may respond differently to heat. Always practice on a small, inconspicuous area first to understand how the material reacts to the woodburning pen and adjust your technique accordingly.
Is it safe for children to try wood burning under supervision?
With proper supervision and safety precautions, wood burning can be a safe activity for older children. It’s crucial to teach them about the importance of safety gear, maintaining a clean workspace, and using the woodburning pen responsibly. Always supervise children closely during wood burning activities and ensure they understand and follow safety guidelines.
How can I improve my wood burning skills over time?
To improve your wood burning skills over time, practice regularly and experiment with different techniques, tips, and materials. Seek out tutorials, books, or classes to learn new methods and gain inspiration from other artists. As you gain experience, challenge yourself with more intricate designs and projects to continue refining your skills.
What are some ideas for wood burning projects that I can try as a beginner?
As a beginner, consider starting with simple wood burning projects like coasters, picture frames, or wooden spoons. You can also create personalized gifts such as keychains, ornaments, or bookmarks. Once you become more comfortable with the techniques, you can move on to more complex projects like wall art, decorative boxes, or even furniture accents. The possibilities are endless, so let your creativity guide you.
Conclusion
In this article, we’ve covered the essential materials and tools needed for wood burning, how to set up a proper workspace, and the basics of wood burning techniques. We’ve also provided a step-by-step guide to creating your wood burning project, as well as tips and tricks for successful wood burning.
Wood burning is a rewarding and creative art form that anyone can learn with patience and practice. We encourage you to give it a try and explore the various techniques and styles available. As you continue to practice and experiment, you’ll develop your skills and create unique, personalized works of art.
We’d love to hear about your wood burning experiences and see the projects you’ve created. Feel free to share your thoughts, tips, and finished pieces with us, as well as any questions you may have. We believe that sharing and learning from each other’s experiences can inspire growth and creativity within the wood burning community. Happy wood burning!
References
- Chandler, D. (2020). Pyrography Basics: Techniques and Exercises for Beginners. Fox Chapel Publishing. Retrieved from https://www.foxchapelpublishing.com/pyrography-basics.html
- Irish, L. S. (2018). Woodburning Project & Pattern Treasury: Create Your Own Pyrography Art with 75 Mix-and-Match Designs. Fox Chapel Publishing.
- Walnut Hollow. (2021). Getting Started with Wood Burning.
- Woodcraft. (2021). Choosing the Best Wood Burning Tools. Retrieved from https://www.woodcraft.com/
- Pyrography Online. (2021). Pyrography Techniques, Patterns, and Projects for All Skill Levels.




Leave a Reply