Imagine standing before a mesmerizing artwork, a vivid landscape or a lifelike portrait, and as you inch closer, you’re astounded to discover that this complex masterpiece is composed entirely of tiny dots. Each dot—meticulously placed, deliberately distanced—unites to create shades, contours, and depth, making the image almost leap off the canvas. Welcome to the enchanting world of stippling, an art technique as meditative as it is expressive.
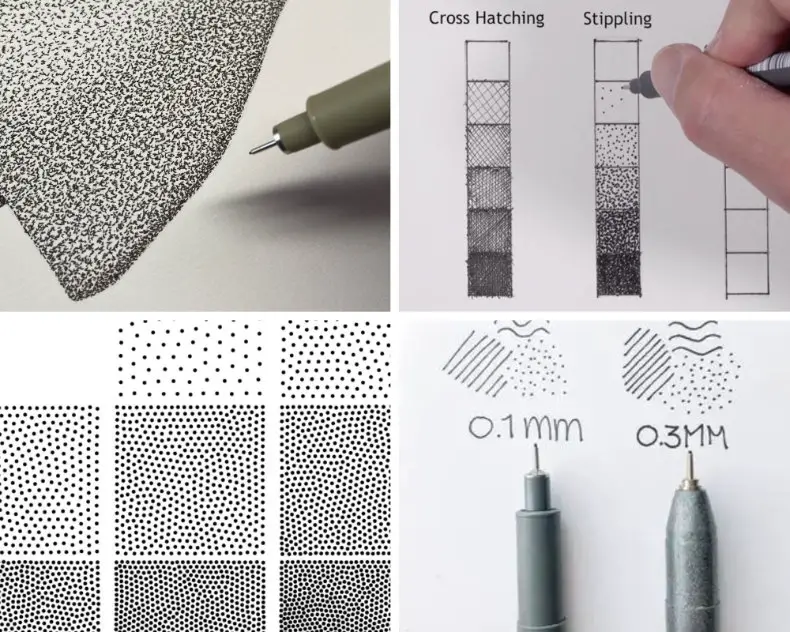
In this comprehensive guide, we’ll dive into the captivating realm of stippling, exploring its rich history and the science behind how a constellation of dots can evoke such powerful visual experiences. You’ll also get hands-on with a step-by-step tutorial, aimed at both budding artists and seasoned veterans, to create your own stippled masterpiece. But that’s not all; we’ll also cover the types of materials best suited for stippling and offer insights into mastering this technique.
Stippling isn’t confined to the world of fine art; it has versatile applications in various crafts and hobbies. From textile design to tattoo artistry and even woodworking, understanding stippling can unlock new dimensions in your creative journey. Ready to dive in? Let’s get started.
What is Stippling: The Basics
Definition of Stippling
Stippling is an artistic technique where patterns, shading, and textures are created using a series of individual dots. Unlike traditional drawing or painting, which often employs lines and strokes, stippling relies on the density, size, and placement of dots to build up an image. In essence, stippling is the art of dotting your way to a visual masterpiece.
Historical Background
Stippling has deep roots, tracing back to engravings and prints of the Renaissance era. It gained prominence in the 18th century as artists like Giulio Campagnola started employing the technique in their works. Over the years, stippling evolved to adapt to various artistic mediums and is now a celebrated form of expression for both traditional and digital artists.
Common Mediums Where Stippling is Used
- Ink: The most common medium, usually employing fine-tip pens for precision.
- Paint: Typically utilized for larger canvases, where individual dots can be applied using the tip of a brush.
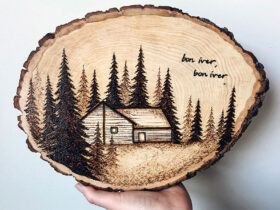
- Wood: Stippling is also used in pyrography, where a heated tool creates burn dots on wood to form an image.
- Metal: In metalworking, stippling can be used to create textured surfaces or intricate designs on jewelry and artifacts.
- Textiles: Some artists even use stippling techniques in embroidery and fabric design, using stitches to create dot patterns.
Whether you’re wielding a pen, a paintbrush, or even a blowtorch, stippling offers a universe of creative possibilities across different mediums. It’s this versatility, along with the technique’s rich history, that makes stippling an intriguing skill to master for any dedicated artist or hobbyist.
The Science of Dots
How Stippling Works: Visual and Tactile Dynamics
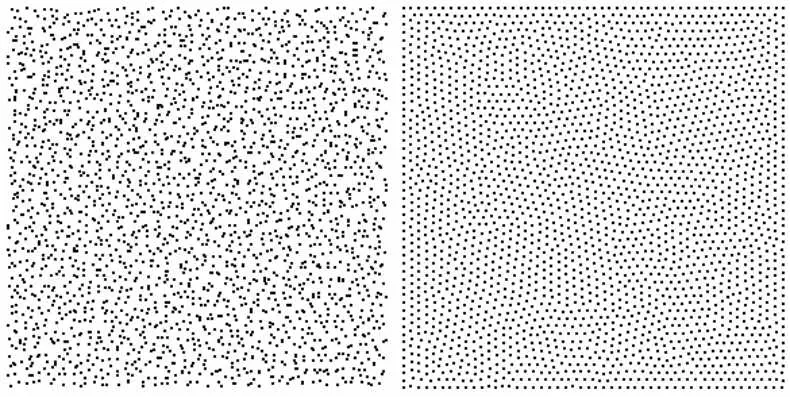
At first glance, stippling might seem simple: it’s all about dots, right? But delve a little deeper, and you’ll find an intricate dance between visual perception and tactile execution. Your eyes and brain collaborate to interpret a field of isolated dots as a cohesive image. Meanwhile, your hand—armed with a fine-tip pen, brush, or other tool—must possess the dexterity and control to place each dot with intention. The tactile element involves a subtle yet purposeful touch, varying pressure to produce dots of different sizes for shading and depth.
The Optical Illusion Behind Stippling
Here’s where the magic happens: your brain naturally wants to find patterns and connect dots, both literally and metaphorically. In stippling art, the dots are carefully arranged so that from a distance, they blend together to form various tones and shapes, creating what is essentially an optical illusion. Your eyes fill in the gaps, smoothing out the hard edges of each dot to see a continuous tone or shade. This phenomenon, known as “gestalt,” describes how our perception organizes individual elements into a unified whole.
So, not only does stippling provide an aesthetic appeal, but it also engages your brain in a fascinating perceptual journey. You’re not just looking at a stippled piece; you’re experiencing it, both visually and cognitively. The dots come alive, transforming into intricate textures, shades, and even emotions, as your mind bridges the spaces in between.
Materials Needed for Stippling
Creating a stippled masterpiece is not just about skill and technique; it’s also about having the right tools. In this section, we’ll look at the different types of materials you’ll need to embark on your stippling journey.
Types of Paper or Canvas
- Watercolor Paper: Great for ink and offers a textured surface for added depth.
- Sketch Paper: Ideal for practice runs or simple ink-based projects.
- Canvas: Perfect for larger-scale works, especially when using paint.
Types of Pens or Other Tools
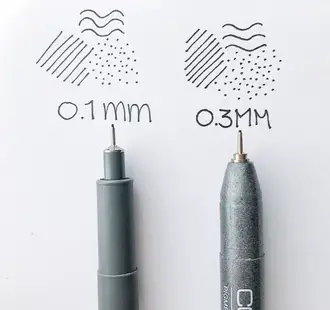
- Fine-tip Pens: For meticulous, detailed work.
- Paintbrush: When you need flexibility and are working on larger pieces.
- Stippling Brushes: Perfect for covering large areas quickly.
Optional Accessories
- Rulers: Helpful for geometric designs or when precision is required.
- Erasers: Essential if you plan to draft your design before stippling.
- Magnifying Glass: Useful for extremely detailed projects.
Comparison of Stippling Tools
| Tool | Pros | Cons | Price Range |
|---|---|---|---|
| Fine-tip Pen | Precise, easy to control | Can dry out | $$ |
| Paintbrush | Flexible, good for larger work | Less control | $$-$$$ |
| Stippling Brush | Quick, covers large area | Less detailed | $$$ |
Choosing the right tools can make a significant difference in your stippling experience. It not only affects the ease with which you can create but also the quality of the final piece. So invest wisely, and you’ll find that the world of stippling becomes an even more rewarding landscape to explore.
Step-by-Step Tutorial: Creating Your First Stippling Art
Unveiling your creative prowess through stippling art? Sounds exciting, doesn’t it? Let’s walk through a step-by-step guide that will help you unleash your inner artist.
Preparation: Lay Out Your Materials
Before you jump into the dot-filled world of stippling, make sure you have all your materials laid out:
- Paper or canvas
- Fine-tip pen, paintbrush, or stippling brush
- Ruler and eraser (optional)
- A clean, well-lit workspace
Sketching: Lightly Outline Your Design
Sketch out your intended design lightly with a pencil. This serves as a guide, helping you avoid mistakes during the stippling process. If you’re a seasoned artist, you might opt to freehand, but a sketch is always useful for beginners.
Dot Placement: Start the Stippling Process
It’s time to stipple! Starting from one corner of your sketch, begin adding dots with your chosen tool. Be mindful of the following:
- Spacing: To create lighter shades, space your dots further apart.
- Density: For darker areas, bring the dots closer together.
- Size: Vary the size of your dots to add texture and dimension.
Layering: How to Create Depth and Contrast
Layering is essential for creating a stippling masterpiece:
- First Layer: Start with the basic, broader dots that outline your shapes and main areas.
- Second Layer: Add medium-sized dots to begin forming your tones.
- Third Layer: Fine, closely-spaced dots can be added to create deeper shades and intricate details.
Final Touches: Adding Details and Fixing Mistakes
After you’ve laid down the majority of your dots, step back and evaluate:
- Details: Use your fine-tip pen to add delicate details that bring your image to life.
- Fixing Mistakes: If an area looks too dense or too sparse, balance it out by adding or reducing dots.
And there you have it! You’ve just created your first piece of stippling art. Frame it, gift it, or add it to your portfolio; the world of stippling offers endless possibilities for artistic expression.
Pro Tips for Mastering Stippling Art
You’ve got the basics down, but let’s kick it up a notch! Even experienced artists can benefit from these tried-and-true stippling tips.
Use Consistent Pressure for Uniform Dots
You might not think about it, but the pressure you apply while stippling significantly influences your final piece. Consistent pressure ensures uniform dots, which is crucial for areas requiring a consistent shade or texture. Make it a habit to practice this skill to elevate your art to a professional level.
Vary Dot Size for Texture and Depth
While uniformity has its place, variety is the spice of stippling life. Experiment with dot size to add texture and depth to your artwork. This nuanced approach can turn a good piece into a masterpiece, providing that ‘wow’ factor that captivates the audience.
Take Breaks to Prevent Hand Strain
Stippling is a meticulous and time-consuming process, making it easy to lose track of time. However, prolonged periods can lead to hand and wrist strain, affecting the quality of your work. Make sure to take short breaks, stretch your hands, and even do some wrist exercises to keep your stippling game strong and your health intact.
Incorporate these pro tips into your stippling routine, and you’ll notice a marked improvement in your technique and the quality of your artwork.
How to Master Stippling: Beyond the Basics
Stippling is much more than just dots on a page; it’s a nuanced art form that you can spend a lifetime mastering. Whether you’re an enthusiastic beginner or a practiced hobbyist, here are some ways to take your stippling to the next level.
Practice Exercises to Hone Your Skills
Mastering stippling is all about practice, practice, practice. Here are some exercises to try:
- Gradients: Practice creating gradients from dark to light to understand the spacing and density of dots.
- Shapes: Stipple basic shapes like circles, squares, and triangles. This will help you understand contouring.
- Textures: Try to replicate textures like fur, leaves, or water. This can help you learn how to vary dot size and density effectively.
Advanced Techniques: Cross-Stippling and More
Once you’re comfortable with basic stippling, you can explore advanced techniques like:
- Cross-Stippling: This involves laying one layer of dots and then crossing it with another layer. This technique can produce richer, more complex textures and tones.
- Mixed Media: Try incorporating stippling with other techniques like line drawing or watercolor to create multi-dimensional pieces.
Ways to Incorporate Stippling into Other Art Forms
Stippling isn’t just confined to ink and paper; it’s a versatile technique that can be incorporated into various other art forms:
- Fabric Art: Consider using stippling in embroidery or quilting.
- Woodwork: Stippling can be used for decorative effects in wood burning.
- Metal Art: Skilled artists can even incorporate stippling into metalwork for textures in jewelry or sculptures.
So, unleash your imagination and venture beyond the conventional. With these advanced tips and exercises, you’ll not only become a stippling master but also discover new avenues for your artistic expression.
Stippling in the Modern World: Beyond Ink and Paper
Stippling has come a long way since its humble origins. In today’s digital age and creative landscapes, this age-old technique is experiencing a modern renaissance. Let’s dive into how stippling has evolved and permeated various aspects of contemporary life.
Digital Stippling with Graphic Design Software
Gone are the days when stippling was limited to physical media. With graphic design software like Adobe Illustrator and Procreate, artists are now creating digital stippling masterpieces. Digital stippling offers advantages like easy error correction and layering capabilities, making it easier than ever to create intricate designs.
Stippling in Fashion and Decor
Stippling isn’t confined to two-dimensional art. It’s making waves in the fashion and decor industries as well. You’ll find stippled patterns on textiles, wallpapers, and even furniture. The technique adds a touch of texture and sophistication, making it a go-to for designers looking to add depth and intricacy to their creations.
Artists Renowned for Their Stippling Techniques
Stippling has been the cornerstone of many artists’ careers, some of whom have become household names in the art community. Artists like Miguel Endara and Paul Stowe are celebrated for their incredible attention to detail in their stippled artwork, creating pieces that are both hyper-realistic and emotionally evocative.
As you can see, stippling has transcended its traditional boundaries to find a home in the modern world. Whether it’s the digital realm, fashion runways, or contemporary art galleries, stippling continues to make its mark, dot by tiny dot. So, why not integrate this timeless technique into your own modern masterpieces?
Conclusion
Stippling, the art of capturing light and shadow, form and texture, all through a series of meticulously placed dots, is as intricate as it is gratifying. Each dot is like a note in a symphony, individually insignificant, but collectively breathtaking. Whether you’re a seasoned artist or a curious beginner, the beauty of stippling lies in its adaptability and the joy it brings at every skill level.
From its rich history and foundational principles to its modern adaptations and uses, stippling remains an ever-relevant and versatile art form. It challenges you to be patient, meticulous, and, above all, expressive. Even in today’s fast-paced, digitally-driven world, the simple act of putting dot to surface encourages us to slow down, to focus, and to create something truly remarkable.





Leave a Reply