In the world of woodworking, choosing the right tool for the job can make all the difference in the outcome of your projects. One common dilemma that woodworkers face is deciding between using a hammer or a mallet. In this comprehensive guide, we will dive into the hammer vs mallet debate and explore the differences between these two essential tools. Understanding their unique characteristics and specific applications will not only help you make more informed decisions but also elevate the quality of your woodworking projects. So, let’s get started and discover the key factors to consider when deciding between a hammer and a mallet for your woodworking needs.

Overview of Hammers and Mallets
Definition of a hammer
Basic anatomy of a hammer: handle, head, and striking surface
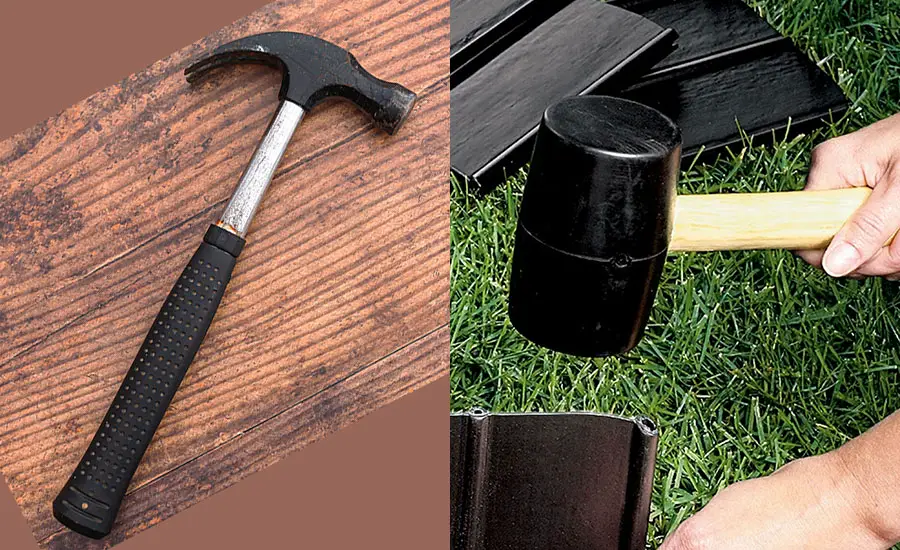
A hammer is a versatile hand tool that has been used throughout history for various purposes. It consists of three main components: the handle, the head, and the striking surface. The handle is typically made of wood, fiberglass, or steel and provides the user with a comfortable grip. The head, usually made of metal, is designed to deliver force to an object when swung. The striking surface, found at the front of the head, is used to apply impact on the targeted object.
Common types of hammers used in woodworking
In woodworking, there are several types of hammers that cater to specific tasks. Some common examples include:
- Claw hammer: This is a versatile hammer, featuring a flat striking surface on one side and a curved claw on the other. The claw is used to pull out nails or provide leverage when working with wood.
- Framing hammer: A framing hammer is larger and heavier than a standard claw hammer. It’s designed for framing work, with a longer handle for increased leverage and a heavier head for driving nails quickly into lumber.
Definition of a mallet
Basic anatomy of a mallet: handle, head, and striking surface
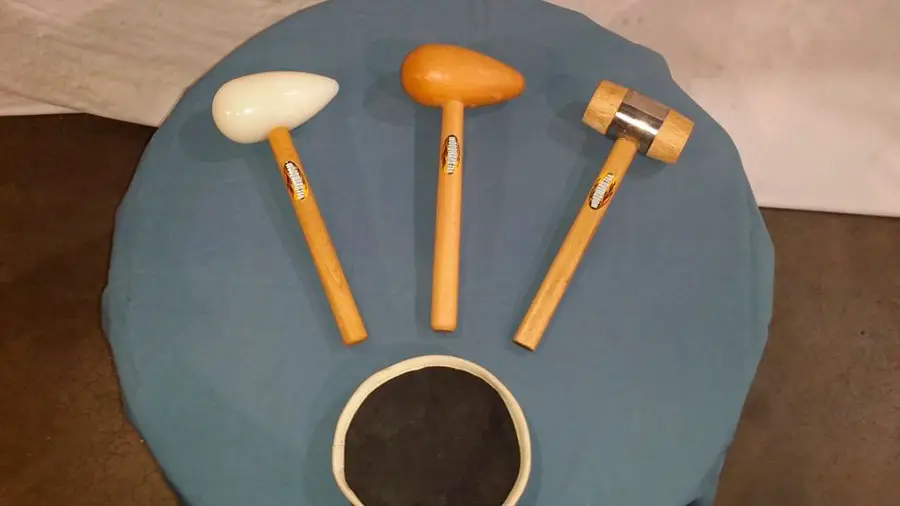
A mallet is a specialized hand tool used in woodworking and other crafts. Like a hammer, it has a handle, a head, and a striking surface. However, the head of a mallet is typically made from softer materials such as wood, rubber, or plastic. This design helps to minimize damage to the surface being struck while still delivering a substantial amount of force.
Common types of mallets used in woodworking
Woodworking mallets come in various shapes and materials to suit different tasks. Some common types of mallets include:
- Wooden mallet: Constructed with a solid wooden head, a wooden mallet is ideal for striking chisels, adjusting joinery, or tapping wooden parts together without causing damage.
- Rubber mallet: With a head made of rubber, this mallet is well-suited for assembling furniture or applying force to delicate surfaces without leaving marks or dents.
Differences Between Hammers and Mallets
Materials
- Hammerhead materials: steel, brass, or other metals The head of a hammer is typically made from durable materials such as steel, brass, or other metals. This construction allows hammers to deliver a strong impact and makes them suitable for tasks that require force, like driving nails into wood.
- Mallet head materials: wood, rubber, or other soft materials Mallets, on the other hand, feature heads made of softer materials like wood, rubber, or plastic. These materials provide a gentler impact, making mallets a more suitable choice when working with delicate surfaces or when precision is required.
Striking Force and Impact
- Hammers: higher striking force, potential to mar surfaces Hammers deliver a high striking force due to their metal heads. While this force is useful for driving nails or breaking apart materials, it also has the potential to damage or mar surfaces, especially when working with softer woods or delicate pieces.
- Mallets: softer impact, less likely to damage surfaces Mallets, with their softer head materials, provide a more forgiving impact. This characteristic makes them a preferred option when working on tasks that require a gentle touch or when there’s a risk of damaging the material being struck.
Applications in Woodworking
- Hammers: driving nails, assembling/disassembling joints, light demolition In woodworking, hammers are commonly used for tasks that require force, such as driving nails into wood, assembling or disassembling joints, and performing light demolition work. Their metal heads make them well-suited for these high-impact tasks.
- Mallets: striking chisels, adjusting joinery, tapping wooden pieces together Mallets, with their softer striking surfaces, are ideal for woodworking tasks that demand precision and care. Examples of these tasks include striking chisels to make precise cuts, adjusting joinery without damaging the wood, and gently tapping wooden pieces together during assembly. The design of a mallet minimizes the risk of surface damage, making it a more suitable choice for delicate woodworking projects.

When to Use a Hammer in Woodworking
Pros and Cons of Using a Hammer
Pros:
- Provides strong striking force: Hammers deliver a high-impact force that is useful for driving nails and performing other heavy-duty tasks.
- Versatile: Hammers can be used for a wide range of woodworking tasks, making them a valuable addition to any workshop.
- Durable: The metal construction of hammerheads ensures their durability, providing a long-lasting tool for various projects.
Cons:
- Potential to damage surfaces: The high-impact force generated by hammers can mar or damage delicate surfaces.
- Less suitable for precision tasks: Hammers may not be the best choice for tasks that require a gentle touch or precise control.
Specific Situations and Tasks
- Driving nails: Hammers are ideal for driving nails into wood, whether it’s for framing, attaching trim, or hanging artwork.
- Assembling or disassembling joints: Use a hammer to tap joints together or apart during the assembly or disassembly process.
- Light demolition: Hammers are useful for breaking apart old furniture or removing nails from reclaimed lumber.
Expert Tips for Using Hammers Safely and Effectively
- Choose the right hammer for the task: Select the appropriate hammer type and weight for the specific woodworking task you’re performing.
- Use a proper grip: Hold the hammer near the end of the handle to maximize leverage and control.
- Use caution when striking: Always strike with a controlled motion and avoid using excessive force, which can lead to accidents or damage to your workpiece.
- Wear safety gear: Protect yourself with safety glasses and gloves when using a hammer to prevent injuries from flying debris or missed strikes.
- Maintain your hammer: Regularly inspect your hammer for damage or wear, and replace it when necessary to ensure optimal performance and safety.
When to Use a Mallet in Woodworking
Pros and Cons of Using a Mallet
Pros:
- Gentle impact: Mallets deliver a softer impact, making them suitable for delicate surfaces or precision tasks.
- Reduced risk of surface damage: The softer materials used for mallet heads minimize the risk of damaging the workpiece.
- Ideal for chisel work: Mallets are perfect for striking chisels, providing controlled force while protecting the chisel handle.
Cons:
- Limited striking force: Mallets may not provide enough force for heavy-duty tasks, such as driving large nails or breaking apart sturdy materials.
- Less versatile: Mallets are specialized tools, which means they may not be suitable for a wide range of woodworking tasks.

Specific Situations and Tasks
- Striking chisels: Mallets are ideal for striking chisels during carving or joinery work, offering controlled force without damaging the chisel or workpiece.
- Adjusting joinery: Use a mallet to tap joints into place or make fine adjustments without causing damage to the wood.
- Tapping wooden pieces together: Mallets are perfect for gently tapping wooden components together during assembly, ensuring a tight fit without marring the surface.
Expert Tips for Using Mallets Safely and Effectively
- Choose the right mallet for the task: Select a mallet with the appropriate head material and size for your specific woodworking project.
- Use proper striking technique: Strike with a controlled motion, ensuring the mallet face is parallel to the surface being struck.
- Pair with the correct chisel: When using a mallet with a chisel, ensure the chisel is sharp and properly sized for the task.
- Store mallets properly: Store mallets in a dry, cool place to prevent damage or warping to the head material, especially for wooden mallets.
- Inspect your mallet: Regularly check your mallet for wear or damage, and replace it when necessary to ensure optimal performance and safety.
Choosing the Right Tool for Your Project
Factors to Consider
- Type of woodworking project: Consider the specific tasks involved in your woodworking project, such as carving, joinery, or assembling furniture, and select a hammer or mallet that’s suitable for those tasks.
- Materials being used: The materials you’re working with, such as hardwood or softwood, will influence your choice of tool. Hammers are better suited for tasks that require more force, while mallets are ideal for delicate or precision work.
- Desired outcome or finish: Think about the desired finish of your project and whether using a hammer or mallet will help achieve that result. For example, a mallet might be more appropriate for tasks where surface damage must be minimized.
Tips for Selecting and Maintaining Your Hammer or Mallet
- Choose quality tools: Invest in well-made hammers and mallets from reputable brands to ensure durability and reliable performance.
- Match the tool to the task: Select the appropriate type of hammer or mallet for the specific task at hand. For example, use a claw hammer for driving nails or a wooden mallet for striking chisels.
- Keep your tools in good condition: Regularly inspect your hammers and mallets for signs of wear or damage, such as loose or cracked heads, and replace them when necessary.
- Store your tools properly: Keep your hammers and mallets in a cool, dry place, away from direct sunlight or moisture, to prevent rust, warping, or other damage.
- Clean your tools after use: Wipe down your hammer or mallet with a clean cloth after each use to remove any debris or residue, and apply a light coat of oil to metal parts if necessary to prevent rust.
- Sharpen and maintain chisels: When using a mallet with chisels, ensure the chisels are sharp and in good condition for optimal performance and safety.
- Practice proper technique: Use the correct striking technique and grip for each tool to minimize the risk of injury and ensure the best results for your woodworking project.
Conclusion
In this comprehensive exploration of hammer vs mallet, we’ve delved into the key differences between these essential woodworking tools, their specific applications, and factors to consider when choosing the right tool for your project. As we’ve seen, hammers provide a strong striking force and are ideal for tasks like driving nails and assembling joints, while mallets offer a gentler impact, making them perfect for precision work and striking chisels.
Understanding the nuances of hammer vs mallet use in woodworking is crucial for achieving the desired outcome and finish in your projects. By considering the type of project, materials being used, and your desired results, you can make informed decisions about which tool is most suitable for each task. We encourage you to apply the knowledge gained from this article to enhance your woodworking skills and elevate the quality of your projects. Remember, having the right tool for the job is essential for achieving success in your woodworking endeavors.
FAQ
In addition to the information provided throughout this article, we’ve compiled a list of frequently asked questions regarding hammers and mallets in woodworking. These questions address common concerns and provide additional insights to help you make the most of these essential tools in your projects.
Can I use a metal mallet for woodworking tasks?
It’s not recommended to use a metal mallet for woodworking tasks, as its hard surface may damage the wood or other tools, such as chisels. Opt for a mallet with a softer head material, like wood or rubber, to minimize the risk of damage.
What are some alternative tools for striking chisels if I don’t have a mallet?
If you don’t have a mallet, you can use a wooden or rubber dead-blow hammer as an alternative for striking chisels. However, avoid using metal hammers, as they can damage the chisel handle and the workpiece.
How do I choose the right hammer weight for my woodworking tasks?
Select a hammer weight based on the specific task and your comfort level. Lighter hammers (e.g., 16 oz) are suitable for precise tasks and driving small nails, while heavier hammers (e.g., 20-32 oz) provide more force for driving larger nails and heavier-duty tasks. Your comfort and control while using the hammer are also essential factors to consider.
Are there any specific safety precautions to take when using a hammer or mallet in woodworking?
Some safety precautions include wearing safety glasses and gloves, using the proper grip and striking technique, maintaining a stable stance, and keeping the work area clean and free of debris. Regularly inspect your tools for signs of damage or wear and replace them as needed.
How do I properly maintain a wooden mallet to ensure its longevity?
To maintain a wooden mallet, store it in a cool, dry place away from moisture and direct sunlight to prevent warping or cracking. Keep the mallet clean by wiping it down after each use and periodically inspect it for signs of wear, such as loose or cracked heads, and replace it when necessary.
References:
- Fine Woodworking: How to Choose the Right Hammer for Your Projects – https://www.finewoodworking.com/
- The Wood Whisperer: Woodworking Mallets – What You Need to Know – https://www.thewoodwhisperer.com/
- Woodworking Network: Proper Hammer Techniques for Woodworkers – https://www.woodworkingnetwork.com/


Leave a Reply