If you’re an artist, you’ve likely encountered gesso at some point in your creative journey. Gesso is a primer that’s used to prepare surfaces like canvas, wood, and paper for painting. It creates a smooth and consistent base that allows paint to adhere better and last longer. As an essential step in the painting process, one question that often arises is: how long does gesso take to dry? Understanding the drying times for gesso is crucial for artists, as it helps prevent potential issues like cracking, uneven surfaces, and poor paint adhesion. In this article, we’ll dive into the factors affecting gesso drying times and offer tips to ensure a successful outcome for your art projects.
What Is Gesso?
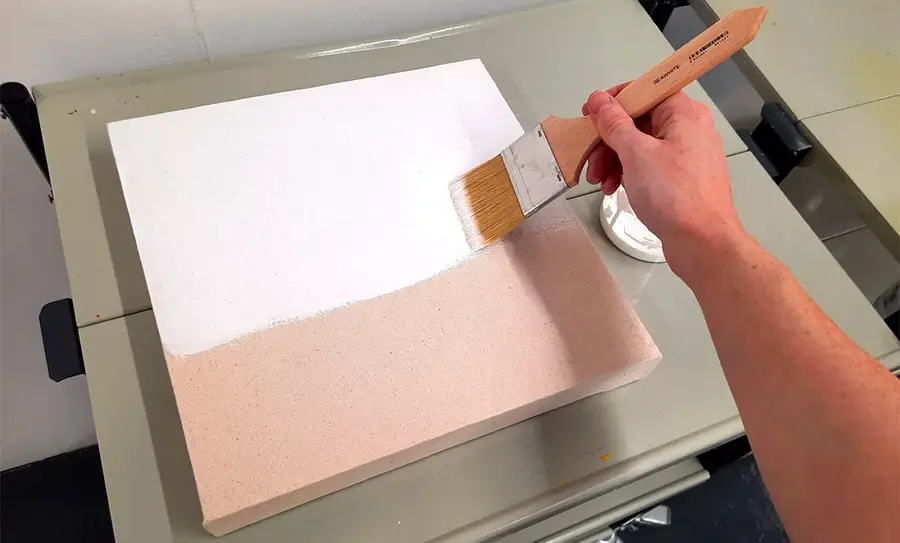
Gesso is a primer commonly used by artists to prepare surfaces such as canvas, wood, and paper for painting. It creates a barrier between the surface and the paint, preventing paint from soaking into the surface and ensuring proper adhesion. Gesso also provides a consistent, slightly textured surface that helps paint glide smoothly and evenly.
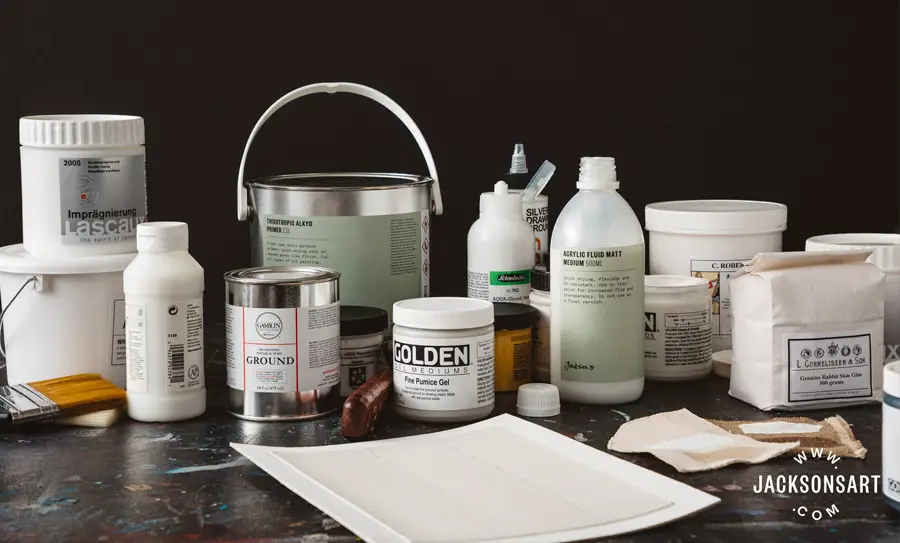
There are different types of gesso, including acrylic, traditional, and oil-based gesso. Acrylic gesso is water-based and works well with acrylic and oil paints, while traditional gesso is made from a mixture of chalk, gypsum, or marble dust and animal glue, and is typically used with egg tempera or oil paints. Oil-based gesso is specifically designed for oil painting and provides a more flexible and durable surface than acrylic or traditional gesso.
Factors Affecting Gesso Drying Time
When it comes to figuring out how long gesso takes to dry, several factors can influence the drying time. Being aware of these factors can help you better plan your artwork and avoid any setbacks during the painting process.
Thickness of the gesso application
The thickness of the gesso layer plays a significant role in drying time. Generally, thin layers of gesso will dry faster than thicker applications. Applying multiple thin coats, rather than one thick layer, can help speed up the overall drying process while still providing the desired level of coverage.
Humidity and temperature
Environmental factors, such as humidity and temperature, can also impact gesso drying times. High humidity levels can slow down the drying process, as moisture in the air prevents the gesso from evaporating quickly. Similarly, cooler temperatures can prolong drying times, while warmer conditions can help speed up the process. To ensure optimal drying, it’s essential to work in a well-ventilated space with controlled humidity and temperature.
Type of gesso (acrylic, traditional, or oil-based)
Different types of gesso have varying drying times. Acrylic gesso, which is water-based, tends to dry faster than traditional gesso made from a mixture of chalk, glue, and pigment. Oil-based gesso, on the other hand, can take even longer to dry due to its oil content. Understanding the specific drying times for the type of gesso you’re using is crucial for planning your painting process accordingly.
Surface material
The material you’re applying gesso to can also affect drying times. Some surfaces, like canvas and paper, tend to absorb moisture more quickly, leading to faster drying times. In contrast, non-porous surfaces like wood or plastic may take longer for gesso to dry, as they don’t absorb moisture as effectively. Taking the surface material into account can help you better anticipate gesso drying times and adjust your painting process as needed.
How Long Does Gesso Take to Dry? Drying Times for Different Types of Gesso
| Type of Gesso | Thin Layers | Thick Layers |
|---|---|---|
| Acrylic | 20-30 minutes | 1-3 hours |
| Traditional | 30-60 minutes | 3-6 hours |
| Oil-based | 2-4 hours | 24-48 hours or more |
Please note that these drying times are approximate and can vary depending on factors such as thickness, humidity, temperature, and surface material. Always make sure to test the specific gesso you’re using to get a more accurate understanding of its drying time.
Tips for Ensuring Proper Gesso Drying
To achieve the best results with your gesso and ensure that your artwork remains in excellent condition, it’s important to follow some key tips when working with gesso:
Applying thin, even layers
One of the most effective ways to ensure proper gesso drying is to apply thin, even layers. This approach not only speeds up the drying process but also helps prevent issues like cracking or uneven surfaces. Use a wide, flat brush to spread the gesso evenly across the surface, and consider using a palette knife for more precise control, especially on textured surfaces.
Allowing for proper ventilation and temperature control
Environmental factors can significantly impact gesso drying times. To create the optimal conditions for drying, work in a well-ventilated space with controlled humidity and temperature. Aim for a room temperature between 65-75°F (18-24°C) and a relative humidity of 40-50%. If necessary, use a dehumidifier or air conditioner to regulate the environment, and avoid working in damp or overly humid conditions.
Waiting for complete drying before applying additional layers or paint
Patience is crucial when working with gesso. Before applying additional layers of gesso or starting to paint, make sure the previous layer is completely dry. Rushing the process and painting over partially dried gesso can lead to issues like poor adhesion, cracking, and uneven surfaces. Depending on the type of gesso and the factors mentioned earlier, this waiting period may range from a few minutes to several hours or even days. Always refer to the manufacturer’s guidelines and test the surface to ensure complete drying before proceeding.
An additional tip for artists working with acrylic paint is to know how to thin acrylic paint to achieve the desired consistency. Thinning acrylic paint can improve its flow and help it adhere better to a gesso-primed surface. To thin acrylic paint, simply add a few drops of water or a specialized acrylic paint thinner to your paint and mix it thoroughly. Remember to add the water or thinner gradually, as too much can compromise the paint’s integrity and affect its adhesion to the gesso surface.
Common Mistakes and How to Avoid Them
When working with gesso, it’s essential to be aware of common mistakes that could negatively impact your artwork. By understanding these pitfalls, you can take steps to avoid them and ensure the best possible results for your project.
Applying gesso too thickly
One common mistake is applying gesso too thickly. To avoid this issue:
- Always apply gesso in thin, even layers.
- Use a wide, flat brush or a palette knife to spread the gesso evenly across the surface.
- Consider applying multiple thin coats rather than one thick layer for better coverage and faster drying times.
Not waiting for the gesso to dry completely before painting
Another common mistake is not waiting for the gesso to dry completely before starting to paint. To avoid this issue:
- Always wait for the gesso to dry completely before applying additional layers or paint.
- Keep in mind that drying times can vary depending on factors such as the type of gesso, thickness, humidity, temperature, and surface material.
- Refer to the manufacturer’s guidelines and test the surface to ensure complete drying.
Using the wrong type of gesso for your project
Lastly, using the wrong type of gesso for your project can also cause problems. To avoid this issue:
- Always choose the appropriate gesso for your project.
- Use acrylic gesso for acrylic paints, traditional gesso for tempera or egg-based paints, and oil-based gesso for oil paints.
- Make sure to read the product label or consult the manufacturer’s guidelines to ensure you’re using the right type of gesso for your artwork.
Troubleshooting Gesso Drying Issues
Despite your best efforts, you may still encounter some issues with gesso drying. Here are some common problems and their solutions to help you troubleshoot gesso drying issues:
Addressing cracks or uneven surfaces
Cracks or uneven surfaces may occur when gesso is applied too thickly or dries too quickly. To address this issue:
- Remove any loose or cracked gesso using a palette knife or sandpaper.
- Clean the surface to remove any debris.
- Apply a new, thin layer of gesso, ensuring even coverage.
- Allow the gesso to dry completely before applying additional layers or paint.
Dealing with slow-drying gesso
Slow-drying gesso can be a result of high humidity, low temperature, or thick gesso application. To deal with slow-drying gesso:
- Ensure proper ventilation and temperature control in your workspace.
- Use a dehumidifier or air conditioner to regulate humidity levels.
- Apply thinner layers of gesso to speed up drying times.
- If possible, switch to a faster-drying type of gesso, such as acrylic gesso.
Fixing gesso that has dried too quickly
If gesso dries too quickly, it can lead to cracks or uneven surfaces. To fix this issue:
- Carefully remove any cracked or uneven gesso using a palette knife or sandpaper.
- Clean the surface to remove debris.
- Apply a new, thin layer of gesso, ensuring even coverage.
- Adjust your workspace’s humidity and temperature levels to create a more suitable drying environment.
- Consider using a slower-drying gesso, such as traditional or oil-based gesso, if you need more working time.
Conclusion
Understanding how long gesso takes to dry is crucial for any artist working with this versatile primer. As we’ve explored throughout this article, factors such as the thickness of the gesso application, humidity and temperature, type of gesso, and surface material can all impact drying times. By keeping these factors in mind, you can better anticipate and plan for the drying process.
To recap, the approximate drying times for different types of gesso are as follows:
- Acrylic gesso: 20-30 minutes for thin layers, 1-3 hours for thick layers.
- Traditional gesso: 30-60 minutes for thin layers, 3-6 hours for thick layers.
- Oil-based gesso: 2-4 hours for thin layers, 24-48 hours or more for thick layers.
Remember that these are general estimates and may vary depending on your specific conditions. The key to successful art projects lies in ensuring proper gesso drying times. By applying thin, even layers, controlling your workspace’s environment, and patiently waiting for each layer to dry completely, you can create a strong and durable foundation for your artwork. With this knowledge in hand, you can confidently answer the question of how long gesso takes to dry and create masterpieces that stand the test of time.
Frequently Asked Questions
In this section, we’ll address some frequently asked questions related to gesso and its drying process that haven’t been covered in the main article. These answers aim to provide further clarification and guidance for artists working with gesso.
Here are a few questions for the FAQ section:
Can I speed up gesso drying time using a hairdryer or a heat gun?
Yes, you can speed up gesso drying time using a hairdryer or a heat gun, but do so with caution. Use the lowest heat setting and keep the device at a safe distance from the surface to avoid overheating, which can cause cracks or uneven drying. Make sure to move the heat source evenly across the surface to promote uniform drying.
Is it necessary to sand gesso between layers or before painting?
Sanding gesso between layers or before painting is not always necessary but can be beneficial in some cases. Lightly sanding gesso can help smooth out any brush marks or imperfections, creating a more even surface for painting. If you decide to sand, use a fine-grit sandpaper (220-grit or higher) and gently sand the surface in a circular motion. After sanding, wipe the surface with a clean, damp cloth to remove any dust or debris.
How can I tell if my gesso has gone bad, and can it be salvaged?
Gesso can go bad due to factors such as exposure to extreme temperatures, humidity, or contamination. Signs of bad gesso include an unpleasant odor, lumpy or uneven texture, or difficulty in spreading it evenly on a surface. If your gesso has gone bad, it’s best to dispose of it and purchase a new container. Attempting to salvage bad gesso may result in poor adhesion, cracks, or other issues that could negatively affect your artwork.
Can I mix gesso with acrylic paint to create a colored primer?
Yes, you can mix gesso with acrylic paint to create a colored primer. To do this, add a small amount of acrylic paint to the gesso and mix thoroughly until you achieve the desired color. Be aware that mixing gesso with acrylic paint may slightly alter the texture and drying time, so test the mixture on a small area before applying it to your main surface.
What are some alternative priming options if I don’t want to use gesso?
If you don’t want to use gesso, there are a few alternative priming options:
- Acrylic mediums: Clear or tinted acrylic mediums can be used as a primer for acrylic painting. They provide a smooth, non-absorbent surface that allows the paint to adhere well.
- Oil primers: For oil painting, you can use an oil-based primer or an alkyd-based primer to create a suitable surface for oil paints.
- Matte medium: A matte medium can be used as a primer for both acrylic and oil paints. It provides a slightly absorbent surface and helps with adhesion.
- Pre-primed surfaces: Many canvases and art boards are available pre-primed, eliminating the need for additional priming.
It’s important to choose a primer that’s compatible with the type of paint you’re using and appropriate for your specific project to ensure the best results.
References:
- Golden Paints. (n.d.). Understanding the Techniques of Pouring Acrylics. Retrieved from https://www.goldenpaints.com/
- Jackson’s Art Supplies. Size, Primer, Gesso and Ground Explained. Retrieved from https://www.jacksonsart.com/blog/2021/08/23/size-primer-gesso-and-ground-explained/
- Winsor & Newton. (n.d.). Gesso. Retrieved from https://www.winsornewton.com/





Leave a Reply