Have you ever considered trying watercolor on wood? This fun and unique approach to painting combines the charm of watercolor art with the natural beauty of wooden surfaces. It’s a versatile technique that’s been catching on among artists and DIY enthusiasts alike. In this guide, we’ll dive into everything you need to know about using watercolors on wood, from the materials you’ll need to the preparation and painting process. Let’s get started on this creative adventure together!
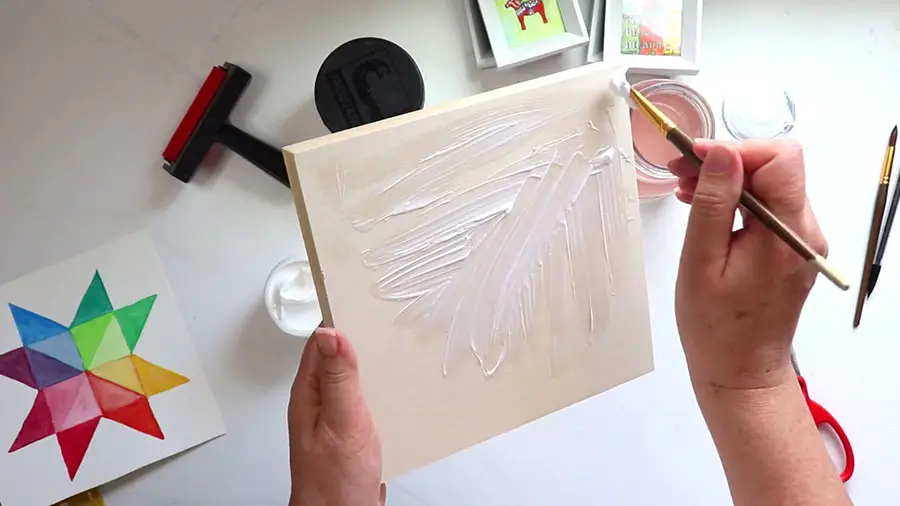
Can You Use Watercolor on Wood?
Absolutely! Watercolors can be used on wood, but it’s essential to understand that the process is slightly different from painting on traditional surfaces like paper or canvas. Wood is a more absorbent material, which means that the watercolors might appear less vibrant or bleed more than they would on paper. However, with proper preparation and technique, you can create stunning watercolor paintings on wooden surfaces.
To make the wood suitable for watercolors, you’ll need to do some prep work. This includes selecting the right type of wood, priming the surface, and smoothing it out. By following these steps, you can ensure that the watercolor paint adheres well to the wooden surface and your final artwork looks polished and professional. In the next sections, we’ll discuss these preparations in more detail, so you can confidently create beautiful watercolor art on wood.
Preparing the Wooden Surface for Watercolors
Before you start painting, it’s crucial to properly prepare the wooden surface to ensure the best results. Here are the two main steps to get your wood ready for watercolors:
- Priming the wood with gesso or a similar primer: Priming is essential when working with watercolors on wood. It creates a barrier between the paint and the absorbent wooden surface, preventing paint from soaking in and helping colors appear more vibrant. Gesso is a popular choice for priming wooden surfaces, as it provides a smooth, slightly absorbent surface that works well with watercolors. Apply a thin layer of gesso using a brush or roller and let it dry completely before moving on.
- Sanding and smoothing the wood: After the primer is dry, create a smooth surface for your watercolor painting. Gently sand the primed wood using fine-grit sandpaper (around 220 grit) to remove any bumps or imperfections. Wipe away any dust with a damp cloth, and you’re ready to begin painting with watercolors on your prepared wooden surface.
How to Paint Watercolors on Wood: Step-by-Step Guide
Now that your wooden surface is prepped, it’s time to start painting! Follow this step-by-step guide to create beautiful watercolor artwork on wood.
Materials needed:
- Prepared wooden surface (primed and sanded)
- Watercolor paints
- Watercolor brushes
- Water container
- Paper towels or a cloth
- Palette or a plate for mixing colors
- Pencil (optional, for sketching)
- Masking tape (optional, for creating borders)
Step 1: Plan your design
Before diving into painting, it’s a good idea to plan your design. You can either sketch your idea on paper first or lightly draw it directly onto the wooden surface using a pencil.
Step 2: Secure the wood
To prevent the wood from moving while you paint, secure it to your work surface using masking tape or place it on an easel if you prefer working vertically.
Step 3: Wet your brush
Dip your watercolor brush in the water container and gently remove excess water by tapping it on the edge or wiping it on a paper towel.
Step 4: Mix your colors
Using your palette or plate, mix your desired watercolor shades. Remember, you can always adjust the intensity of your colors by adding more water for lighter shades or using more pigment for bolder ones.
Step 5: Apply the paint
Start applying the watercolor paint to the wood using your chosen brushes and techniques. Work in layers, allowing each one to dry before adding another to build depth and create different effects.
Step 6: Let the paint dry
Allow the paint to dry completely. Watercolors usually dry relatively quickly, but drying times may vary depending on the thickness of your paint layers and the humidity in your environment.
Step 7: Finishing touches
Once your painting is dry, you can add any final details or touch-ups as needed. If you used masking tape to create borders, carefully remove it to reveal clean edges.
And that’s it! You’ve successfully created a watercolor painting on wood. Remember, practice makes perfect, so keep experimenting with different techniques and color combinations to develop your unique style.
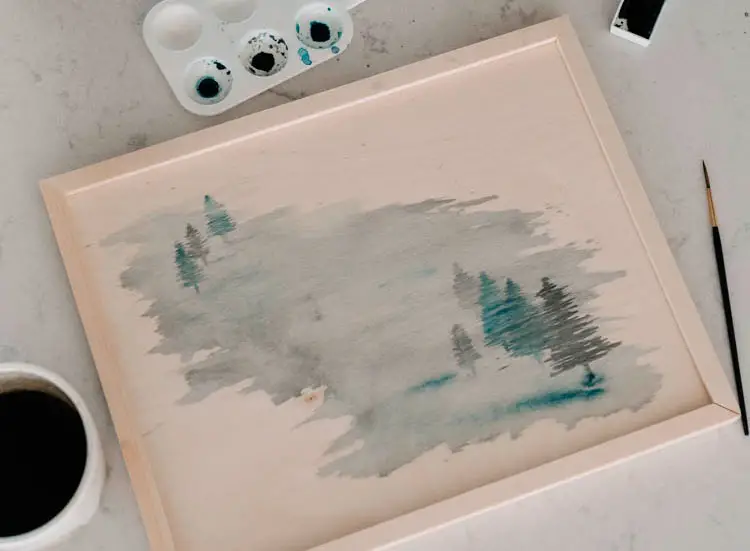
How to Seal Watercolor on Wood: Protecting Your Artwork
Sealing your watercolor painting on wood is an important final step to protect your artwork and ensure its longevity. Here’s why it’s crucial and how to choose and apply the right varnish for your piece.
Importance of sealing watercolor on wood
Sealing your watercolor painting helps to protect it from moisture, dust, and UV rays, which can cause the colors to fade or the artwork to deteriorate over time. A good sealant also makes your piece more resistant to scratches and damage, ensuring that your artwork stays looking its best for years to come.
Types of varnish and how to apply them
There are several types of varnish you can use to seal your watercolor on wood, including spray varnishes and brush-on varnishes. Two popular options are:
- Acrylic varnish: Acrylic varnish is a clear, water-based product that comes in various finishes, such as matte, satin, or gloss. It’s an excellent choice for sealing watercolor paintings because it’s flexible and doesn’t yellow over time. To apply, make sure your painting is completely dry. Then, use a clean, soft brush to apply thin, even layers of varnish. Let each layer dry before applying the next one. Typically, 2-3 layers should be sufficient for adequate protection.
- Spray varnish: Spray varnish is another suitable option for sealing watercolor paintings on wood. It’s available in aerosol cans and comes in different finishes like matte, satin, or gloss. To apply spray varnish, first, ensure that your painting is completely dry and you’re in a well-ventilated area. Hold the can about 12 inches away from your artwork and spray a thin, even layer across the surface. Let it dry before applying additional layers as needed.
Once your artwork is sealed and dry, it’s ready to be displayed and enjoyed!
As you explore different painting techniques and mediums, you might also be interested in trying acrylics on wood. To prepare your wooden surface for acrylic painting, you’ll need to prime the wood, just as you would for watercolors. Priming ensures that the acrylic paint adheres well to the surface and the colors remain vibrant. If you’re interested in learning more about how to prime wood for acrylic painting, be sure to check out our comprehensive guide on the topic.
Watercolors vs. Acrylics: Which is Better for Painting on Wood?
When it comes to painting on wood, both watercolors and acrylics have their unique advantages and disadvantages. To help you decide which medium is best suited for your project, let’s compare the pros and cons of using watercolors and acrylics on wood.
Watercolors
Pros:
- Offers a transparent and luminous quality, allowing the wood grain to show through.
- Easy to blend and create smooth gradients.
- Can achieve delicate and ethereal effects.
- Easy to clean up with water.
Cons:
- Requires proper priming and preparation of the wooden surface.
- Less vibrant and can appear washed out if not applied correctly.
- Can be more difficult to control due to its fluid nature.
- Less durable and requires sealing for long-lasting protection.
Acrylics
Pros:
- Highly pigmented and offers bold, opaque colors.
- Dries quickly, allowing for layering and fast completion of a piece.
- More resistant to fading and generally more durable than watercolors.
- Can be easily manipulated to create various textures and effects.
Cons:
- Can cover the wood grain if applied too thickly.
- May require additional mediums (e.g., retarders) to slow down drying time for blending.
- Can be more challenging to achieve subtle color transitions.
- Cleanup requires more effort, as dried acrylic paint is water-resistant.
Recommendations:
Ultimately, the choice between watercolors and acrylics for painting on wood depends on your artistic preferences and the desired outcome for your piece. If you’re looking for a transparent, delicate, and luminous effect that showcases the wood grain, watercolors may be the better choice. However, keep in mind that you’ll need to properly prime the wood and seal the finished piece.
On the other hand, if you prefer bold, opaque colors and want to create various textures and effects, acrylics might be more suitable. Acrylics are generally more durable and resistant to fading, making them a popular choice for many artists. Just be aware that they can cover the wood grain, and cleanup may require more effort.
Experiment with both mediums to find the one that best aligns with your artistic vision and the specific requirements of your project.
Conclusion
In this article, we’ve explored the exciting world of watercolor on wood, a unique and versatile painting technique. We’ve discussed the compatibility of watercolor with wood as a painting surface and the importance of proper preparation, including priming and sanding the wood. Following our step-by-step guide, you can create beautiful watercolor paintings on wood and protect them by sealing with an appropriate varnish.
We’ve also compared watercolors and acrylics to help you determine which medium best suits your artistic preferences and desired outcomes. Each has its own set of pros and cons, so it’s essential to experiment with both to discover which one aligns with your vision.
Ultimately, the most important thing is to explore your creativity and have fun with your artistic journey. Whether you choose watercolors or acrylics, painting on wood offers endless possibilities for unique and expressive artwork. So go ahead, grab your brushes and paints, and let your imagination guide you as you create stunning masterpieces on wood.
FAQ About Watercolor on Wood
In this FAQ section, we’ll address some common questions and concerns that artists might have when working with watercolor on wood. From using watercolor pencils to achieving texture and depth, we’ve got you covered. Read on to find answers to your watercolor on wood questions and enhance your knowledge and skills in this unique and versatile painting technique.
Can I use watercolor pencils on wood?
Yes, you can use watercolor pencils on wood. Just like regular watercolors, you’ll need to prime the wood surface with a suitable primer such as gesso. Watercolor pencils allow you to draw your design directly onto the wood and then activate the colors with a wet brush, blending and creating various effects as desired.
How do I remove watercolor stains from wood?
If you accidentally get watercolor stains on your wood surface, you can try gently wiping the stained area with a damp cloth or sponge. If the stain persists, you can use a fine-grit sandpaper to lightly sand the stained area. Be cautious not to over-sand, as you may remove more than just the stain. Once the stain is removed, you can reapply primer and paint as necessary.
Can I mix watercolors with other paint types on wood, like gouache or acrylics?
It is possible to mix watercolors with gouache on wood, as both are water-based mediums. You can layer or blend them to create various effects. However, mixing watercolors with acrylics can be challenging because acrylics are water-resistant when dry. You may be able to layer watercolors over acrylics, but blending the two mediums may not yield the desired results.
What other surfaces can I use watercolors on besides paper and wood?
Watercolors can be used on a variety of surfaces, including canvas, fabric, and various types of paper. When using watercolors on non-traditional surfaces, it’s essential to properly prime and prepare the surface to ensure the paint adheres well and the colors remain vibrant.
How do I fix mistakes in my watercolor painting on wood?
Fixing mistakes in watercolor paintings on wood can be tricky, as watercolors are less forgiving than other mediums. You can try to lift the paint by gently wetting the area with a clean brush and blotting it with a paper towel or cloth. If the mistake is minor, you might be able to correct it by painting over it with a lighter or darker shade. In some cases, you may need to let the painting dry, sand the affected area, reapply primer, and repaint that section.
Can I paint watercolor on wood furniture, like chairs or tables?
Yes, you can paint watercolor on wood furniture, such as chairs or tables. Just like painting on any wooden surface, you’ll need to properly prepare the furniture by cleaning, sanding, and priming it before applying watercolors. Keep in mind that watercolor paint may be less durable on furniture surfaces that experience frequent use or wear, so be sure to seal your finished work with a protective varnish.
How do I store my watercolor paintings on wood to ensure their longevity?
To ensure the longevity of your watercolor paintings on wood, store them in a cool, dry place away from direct sunlight, which can cause the colors to fade. Avoid extreme temperature fluctuations and humidity, as these can cause the wood to warp or the paint to crack. If you need to stack your paintings, use acid-free paper or foam sheets between each piece to prevent scratches or color transfer.
Are there any specific brands of watercolors that work best on wood?
Most high-quality watercolor brands will work well on wood, as long as you properly prepare the surface. Brands like Winsor & Newton, Daniel Smith, Schmincke, and Sennelier are known for their quality and pigmentation, which can produce vibrant and long-lasting results on various surfaces, including wood.
Can I use ink or other drawing materials with watercolors on wood?
Yes, you can use ink or other drawing materials, such as graphite or charcoal, with watercolors on wood. You may want to apply the drawing materials before painting with watercolors, as they can provide a base for your design or add detail to your finished piece. Be sure to test your drawing materials on a primed wooden surface to ensure compatibility with your watercolors.
How can I achieve texture and depth in my watercolor painting on wood?
There are several techniques you can use to add texture and depth to your watercolor painting on wood:
- Layering: Apply multiple layers of watercolor, allowing each layer to dry before adding the next. This creates depth and dimension in your piece.
- Wet-on-wet: Apply wet paint to a wet surface, allowing the colors to blend and create soft transitions.
- Dry brush: Use a dry brush and minimal paint to create rough, textured strokes.
- Lifting: Remove paint with a damp brush or sponge to create highlights and texture.
- Mixed media: Incorporate other materials, such as ink, charcoal, or collage elements, to add depth and visual interest to your painting.
Experiment with different techniques to discover the ones that work best for your artistic style and vision.
References:
- Blick Art Materials. (n.d.). How to Prepare a Wood Panel for Painting with Watercolor Ground. Retrieved from https://www.dickblick.com/
- Winsor & Newton. (n.d.). Watercolor Paper and Surfaces. Retrieved from https://www.winsornewton.com/
- Golden Artist Colors, Inc. (n.d.). QoR Watercolor: Painting on Non-Porous Surfaces. Retrieved from https://www.goldenpaints.com/








Leave a Reply