Pressure treated wood, a popular choice in construction and outdoor projects, undergoes a unique treatment process to enhance its resistance to decay, insects, and moisture damage. This versatile material finds application in an array of projects, from decking and fencing to outdoor furniture and landscaping structures. Despite its many advantages, it’s essential to consider the importance of drying pressure treated wood before using it in your projects. Proper drying not only improves the wood’s stability but also ensures optimal performance and longevity.
How to Speed Up Drying of Pressure Treated Wood
Understanding how to speed up drying of pressure treated wood can be a game-changer for both DIY enthusiasts and professional builders. With this in mind, our article aims to provide you with valuable tips and insights to help you expedite the drying process, allowing you to complete your projects more efficiently and achieve outstanding results. So, let’s dive into the world of pressure treated wood and explore the best practices to accelerate its drying time.
Choosing the Right Storage Location
Importance of a well-ventilated area
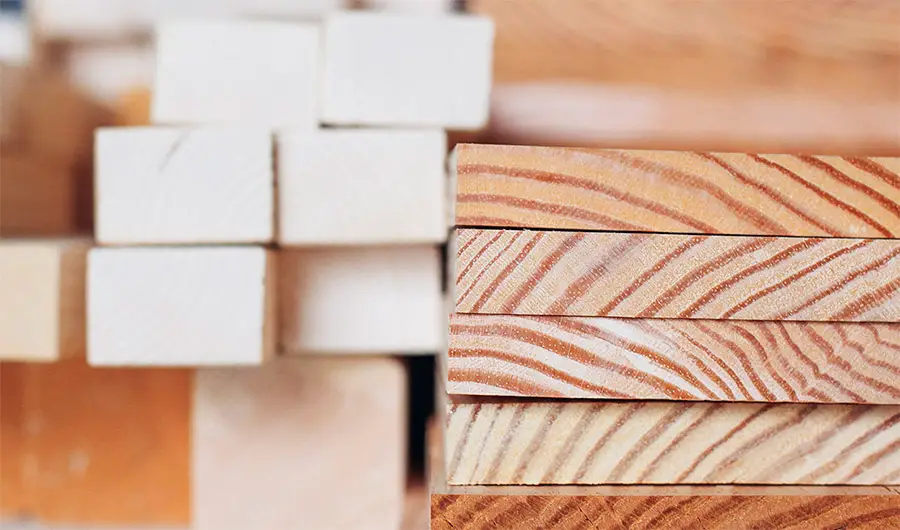
Selecting an appropriate storage location is crucial when it comes to speeding up the drying of pressure treated wood. A well-ventilated area allows for optimal air circulation, which facilitates the evaporation of moisture from the wood. Good ventilation also helps maintain a uniform drying process, minimizing the risks of warping, twisting, or checking.
Ideal temperature and humidity conditions
Temperature and humidity play significant roles in the drying process. Ideally, you should store pressure treated wood in a location where the temperature ranges between 50-70°F (10-21°C) and relative humidity is around 50%. Higher humidity levels can slow down the drying process, while overly dry conditions may cause the wood to crack or split.
Avoiding direct sunlight to prevent warping
Although sunlight can help dry the wood faster, exposing pressure treated wood to direct sunlight for prolonged periods may lead to warping or uneven drying. To prevent this, store the wood in a shaded area or use tarps to shield it from direct sunlight. Be cautious not to cover the wood completely, as this could trap moisture and hinder the drying process. Instead, ensure there is adequate space for air to circulate around the wood.
Stack and Space the Wood Properly
Stack wood horizontally with spacers in between to allow air circulation
To facilitate even drying, stack pressure treated wood horizontally on a flat surface, using spacers between each board. These spacers, often referred to as stickers, create gaps that allow air to flow freely around the wood, promoting consistent drying. Ensure there is enough space between the boards so that moisture can evaporate effectively, preventing the growth of mold or mildew.
Use stickers (wooden spacers) to separate layers and ensure consistent drying
When stacking multiple layers of wood, place stickers of uniform thickness between each layer, aligning them vertically. This arrangement maintains consistent spacing throughout the stack, ensuring even weight distribution and facilitating uniform drying. Using stickers made of dry wood or plastic can help prevent the transfer of moisture between layers.
Ensure the foundation is level to prevent warping
A level foundation is essential for preventing warping or twisting during the drying process. Choose a flat, even surface on which to stack your pressure treated wood, and use shims or additional supports if necessary to create a level base. Additionally, make sure the stickers are of equal thickness and placed directly above one another to maintain the stack’s stability and promote even drying.
Increase Airflow
- Use fans or natural wind to enhance air circulation: Boosting airflow around the pressure treated wood can significantly speed up the drying process. Utilize fans or take advantage of natural wind to increase air circulation around the stacked wood. This enhanced airflow promotes more efficient moisture evaporation, helping the wood to dry faster.
- Position fans strategically for maximum effect: When using fans to improve air circulation, place them strategically to ensure the most effective drying. Position the fans to blow across the wood stack, directing air between the boards and around the spacers. Depending on the size of the stack, you might need multiple fans to cover the entire area evenly. Be sure to monitor the drying progress and adjust fan placement as needed to achieve the best results.
Utilize a Dehumidifier or Heater
- Dehumidifiers and heaters can be valuable tools in speeding up the drying process of pressure treated wood. Dehumidifiers work by reducing the moisture content in the air, which in turn accelerates the rate at which the wood releases moisture. Heaters, on the other hand, raise the temperature in the drying area, increasing the wood’s capacity to release moisture and facilitating faster evaporation.
- When choosing a dehumidifier or heater for your drying setup, consider the size of the space, the volume of wood you’re drying, and the desired drying speed. Select a dehumidifier with a suitable capacity for your specific needs and ensure it has a built-in hygrometer to monitor humidity levels. For heaters, opt for models with thermostats to maintain a consistent temperature.
When using these devices, always follow the manufacturer’s safety guidelines to prevent potential hazards. Place the dehumidifier or heater in a well-ventilated area, away from flammable materials, and ensure there is sufficient clearance around the device for proper air circulation. Regularly check the devices for any issues and maintain them according to the manufacturer’s recommendations. Lastly, monitor the wood’s moisture content throughout the drying process to avoid over-drying, which may cause the wood to become brittle or prone to cracking.
Monitor Moisture Content
Keeping track of the moisture content in pressure treated wood is essential for successful drying and optimal performance in your projects. Monitoring moisture levels helps you determine when the wood is ready for use, preventing problems such as warping, swelling, or shrinkage that can occur if the wood is not adequately dried. It also ensures that you don’t over-dry the wood, which could lead to brittleness or cracking.
Moisture meters are handy tools for measuring the moisture content in wood. These devices come in two primary types: pin-type meters, which use metal probes to penetrate the wood surface, and pinless meters, which use electromagnetic sensors to measure moisture without causing damage. To use a moisture meter, follow the manufacturer’s instructions, taking care to measure multiple areas of the wood for a more accurate reading. Keep in mind that different wood species may have different calibration settings on the meter.
The target moisture content for pressure treated wood depends on its intended use and the climate in which it will be installed. Generally, outdoor projects require a moisture content of around 12-15%, while indoor applications may require a slightly lower moisture content, around 8-12%. It’s essential to research the specific requirements for your project and location to ensure the wood is appropriately dried for optimal performance and longevity.
It’s important to note that attempting to paint wet wood is not recommended. When the wood is still damp, the paint may not adhere properly, leading to peeling or blistering as the wood dries. To ensure the best results, always wait for the wood to reach the recommended moisture content before applying paint or any other finishes.
Determine the Drying Time
- Factors affecting drying time (wood species, initial moisture content, etc.): When considering how long it takes pressure treated wood to dry, it’s essential to understand that the drying time depends on various factors, such as wood species, initial moisture content, and environmental conditions. By taking these factors into account and monitoring the wood’s moisture content, you can better estimate the duration of the drying process and ensure that the wood is ready for use in your projects.
- Estimating how long the process may take: While it’s difficult to provide an exact drying time for pressure treated wood due to the various factors involved, the table below offers a rough estimate based on wood species and initial moisture content. Note that these estimates are for general guidance only and may vary depending on your specific conditions.
| Wood Species | Initial Moisture Content (%) | Estimated Drying Time (Days) |
|---|---|---|
| Pine | 25-30 | 21-28 |
| Cedar | 20-25 | 14-21 |
| Redwood | 15-20 | 10-14 |
| Pressure Treated | 35-50 | 28-60 |
It’s crucial to use a moisture meter to monitor the drying progress and adjust your setup or drying methods as needed to achieve the desired moisture content. Remember that patience and attention to detail are essential in obtaining the best results from the drying process.
Conclusion
In conclusion, speeding up the drying process of pressure treated wood is achievable by following the essential tips we’ve discussed:
- Choose the right storage location with proper ventilation, temperature, and humidity.
- Stack and space the wood properly using spacers and ensuring a level foundation.
- Increase airflow with fans or natural wind.
- Utilize a dehumidifier or heater to enhance the drying environment.
- Monitor moisture content using a moisture meter.
- Determine the drying time, considering factors like wood species and initial moisture content.
By adhering to these guidelines, you can effectively accelerate the drying of pressure treated wood, leading to improved stability, performance, and longevity in your projects. Properly dried wood ensures that your structures, whether indoor or outdoor, will stand the test of time and provide lasting satisfaction. So, take the time to follow these recommendations and achieve better results in all your woodworking endeavors.
FAQ
We understand that you may still have questions about the drying process for pressure treated wood. To help address these concerns, we’ve compiled a list of frequently asked questions that cover additional aspects not explicitly discussed in the main article. This FAQ section aims to provide you with further insight and valuable information on speeding up the drying process for pressure treated wood.
Can I paint or stain pressure treated wood before it’s fully dried?
A: It’s not advisable to paint or stain pressure treated wood before it’s fully dried, as doing so can cause issues such as peeling, blistering, or poor adhesion of the paint or stain. It’s essential to wait until the wood reaches the recommended moisture content before applying any finishes to ensure optimal performance and durability.
How can I tell if my pressure treated wood is dry enough for use without a moisture meter?
Although using a moisture meter is the most accurate method to determine if your wood is dry enough, there are alternative methods. One common technique is the “weight test,” where you weigh a sample piece of wood periodically during the drying process. When the weight no longer decreases, it indicates the wood is dry. Another method is the “nail test,” which involves driving a nail into the wood and checking for moisture on the nail when removed. Note that these methods are less accurate than using a moisture meter.
What are the potential problems of using pressure treated wood that hasn’t dried properly?
Using pressure treated wood that hasn’t dried properly can lead to various issues, such as warping, twisting, or cupping, as the wood continues to lose moisture after installation. Additionally, improper drying may cause the wood to shrink or swell, leading to gaps or tight fits in your project. In some cases, the wood may also be prone to decay or insect infestation if the moisture content remains too high.
Is it necessary to seal pressure treated wood after it has dried?
A: Sealing pressure treated wood after it has dried is not always necessary, but it can provide additional protection against moisture, UV rays, and general wear and tear. Sealing the wood with a water-repellent sealer, paint, or stain can help maintain its appearance and prolong its lifespan, especially for outdoor projects exposed to the elements.
Can I speed up the drying process by using a kiln or oven?
Yes, using a kiln or oven can speed up the drying process for pressure treated wood. However, it’s important to use specialized wood-drying kilns and follow the manufacturer’s guidelines to ensure safe and effective drying. Using a conventional oven for drying wood is not recommended, as it may pose safety risks and result in uneven or inadequate drying.
Does the drying time for pressure treated wood change with different treatment chemicals used?
The drying time for pressure treated wood can vary depending on the treatment chemicals used, as well as the wood species and the initial moisture content. Some treatments may result in a higher initial moisture content, requiring a longer drying time. Always refer to the manufacturer’s recommendations for drying times and conditions specific to the treated wood you’re working with.
What precautions should I take when working with pressure treated wood during the drying process?
When working with pressure treated wood during the drying process, take the following precautions: wear gloves and long sleeves to protect your skin from contact with the chemicals; wear a dust mask and safety goggles to prevent inhalation or contact with sawdust or chemical residue; work in a well-ventilated area to minimize exposure to fumes; and dispose of treated wood scraps and sawdust according to local regulations, as they may contain hazardous chemicals.
Additional Resources
For further reading and information on the drying process of pressure treated wood and related topics, consider the following resources:
- Wood Moisture Meters: A Guide for Beginners – An informative article on moisture meters, their types, and how to use them effectively.
- Wood Handbook: Wood as an Engineering Material – A detailed chapter on wood moisture from the USDA Forest Service’s Wood Handbook.
Recommendations for products or tools that can help in the drying process:
- Moisture Meters: Wagner Meters Orion or General Tools MMD4E offer reliable moisture meters suitable for various applications.
- Dehumidifiers: Frigidaire High-Efficiency Dehumidifier or hOmeLabs Dehumidifier provide efficient moisture control for drying wood.
- Heaters: Dr. Infrared Heater DR-988 or Fahrenheat FUH Electric Heater are suitable options for maintaining consistent temperatures in your drying area.
- Fans: Lasko High-Velocity Pro-Performance Pivoting Utility Fan or XPOWER Professional Axial Air Mover can help improve airflow and speed up the drying process.
- Please note that the listed products are suggestions, and you should research and choose the best options based on your specific needs and requirements.





Leave a Reply