Welcome, fellow artists and craft enthusiasts! It’s time to dive deep into the vibrant world of acrylics, an artist’s reliable ally, and how to manipulate its texture to your advantage.
What is Acrylic Paint?
Let’s start with the basics. Acrylic paint, a favorite among modern artists, is a fast-drying paint made of pigment suspended in acrylic polymer emulsion. Its popularity stems from its versatility and vibrancy. It can be used in thin washes like watercolors, or in thicker layers akin to oil paints. It’s got an attitude as versatile as water and as bold as oil, making it a go-to medium for a variety of art projects.
Key Features of Acrylic Paint
- Versatility: It can mimic watercolor, oil, and even gouache painting.
- Fast-Drying: This makes it ideal for layering and overpainting.
- Vibrant Colors: Acrylics are known for their bright and bold colors.
- Water-Soluble: They can be thinned with water and are easy to clean up.
- Permanent: Once dry, they become water-resistant and have a lasting finish.
The Need for Thickening Acrylic Paint
Now, you might be wondering, “Why would I want to thicken acrylic paint?” Well, here’s the thing: while acrylics are lauded for their versatility, they are naturally quite fluid and thin. Sometimes, you may want to give your artwork more texture, volume, and depth. Thickened acrylic paint can provide a three-dimensional appearance and add a tactile quality to your work, enhancing the overall visual experience.
Thickening your acrylic paint can open up a whole new dimension of artistic possibilities. Whether you’re looking to achieve a heavy impasto effect or simply desire to add some oomph to your brush strokes, knowing how to thicken acrylic paint is a useful trick to have up your painter’s sleeve.
While our focus in this article is on how to make acrylic paint thicker, it’s also worth noting that you may occasionally find the need to thin your acrylic paints. Thinning acrylic paint is simple and can be done by adding water or an acrylic medium to the paint, generally in a 1:1 ratio, or as needed until your desired consistency is achieved. This can be particularly useful for techniques like washes or glazes, or when using an airbrush.
In the sections that follow, we’ll be exploring some handy techniques to transform your acrylic paint from runny to richly textured. Let’s dive in!
Thickening Acrylic Paint with Specialized Gels
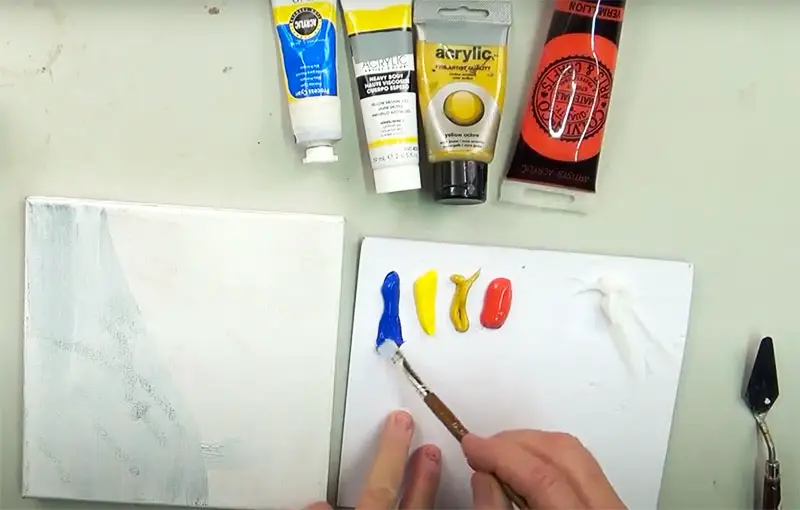
Expanding your artistic repertoire often involves experimenting with different materials. When it comes to thickening acrylic paint, one of the most reliable and professional options is to use specialized gels.
Understanding Thickening Gels
Thickening gels, also known as acrylic mediums, are substances specifically designed to modify the consistency of acrylic paint without affecting its color or longevity. These gels are essentially colorless paint and when mixed with your acrylics, they increase the body of the paint, giving it a thicker, more viscous texture.
Types of Thickening Gels
Thickening gels come in a variety of forms, each offering a unique finish:
- Gloss Gels: These gels dry to a high-gloss finish, enhancing color brilliance and transparency. They are ideal when you want to maintain the vibrancy of your acrylics while adding depth.
- Matte Gels: These gels offer a more muted, non-reflective finish. They are great for adding body to the paint without adding gloss.
- Textured Gels: These are specially formulated gels with added particles for creating different textural effects. Examples include sand gel, stucco, and modeling paste. They not only thicken the paint but also add a tactile quality to your artwork.
Buying Guide for Thickening Gels
When shopping for thickening gels, consider the following:
- Compatibility: Ensure the gel is compatible with acrylic paint. This information should be clearly indicated on the label.
- Finish: Decide whether you want a glossy or matte finish and choose accordingly.
- Texture: If you desire a rough, coarse look, opt for a textured gel.
- Brand: Purchase from reputable brands to ensure quality and consistency.
Step-by-Step: Using a Thickening Gel with Acrylic Paint
Adding a thickening gel to your acrylic paint is a simple process:
- Prepare Your Paint: Squeeze out the amount of paint you plan on using on a palette or dish. Spread it out with a palette knife to make the mixing process easier.
- Add the Gel: Scoop out some thickening gel using your palette knife. Generally, you should not use more gel than a quarter of the amount of paint you’re using to avoid making the paint unstable.
- Mix Well: Blend the gel and paint until they reach a uniform consistency. You can use a brush or a palette knife for this.
- Test: If you’re new to this, start with a small amount of paint and gel. Test the mixture on a piece of scrap canvas to see if you like the consistency and look when it dries.
- Paint: Once you’re satisfied with the consistency, you’re ready to paint! Remember that the gel will make your paint dry faster, so be prepared to start painting right after mixing.
Learning to thicken acrylic paint with a gel medium can unlock a new range of possibilities in your artwork, allowing you to create eye-catching textures and effects. So, grab your palette knife and let’s start experimenting!
We’ll move to more budget-friendly thickening options in the next section.
Using Textured Gels for Acrylic Paint
When it comes to acrylic painting, textured gels open up a whole new world of tactile elements, transforming your two-dimensional artwork into a three-dimensional masterpiece.
Understanding Textured Gels
Textured gels, often categorized under acrylic mediums, are pastes infused with solid materials like sand, glass, or fibers. When mixed with acrylic paint, they not only increase the viscosity but also provide a physical texture to the paint, creating a more tactile and visually appealing result.
Types of Textured Gels
There are several types of textured gels, each lending a unique texture to your paint:
- Stucco Gel: Mimics the look and feel of rough stucco plaster.
- Modeling Paste: Provides a heavy, sculptural texture.
- Sand Gel: Adds a fine or coarse sand-like finish.
- Resin Gel: Creates a high-gloss, resin-like finish with a honey-like consistency.
- Glass Bead Gel: Contains tiny glass beads for a bubbly texture.
Benefits of Using Textured Gels
Using textured gels in your acrylic painting offers several advantages:
- Adds Dimension: They add a physical dimension to your artwork, making it more interactive and engaging.
- Enhances Visual Interest: The added texture increases the visual interest of the painting, making it more appealing.
- Versatility: They allow for a wide range of effects, from subtle texture to dramatic sculptural thickness.
- Increases Body: Like thickening gels, textured gels also increase the body of the paint, making it more manageable.
Step-by-Step: Using a Textured Gel with Acrylic Paint
Incorporating a textured gel into your acrylic paint is quite straightforward:
- Prepare Your Paint: Similar to using a thickening gel, start by spreading out the paint on a palette or dish.
- Add the Gel: Introduce the textured gel to your paint. Maintain a ratio of 1 part gel to 4 parts paint to ensure stability.
- Mix Well: Blend the paint and gel until they merge into a consistent mix. For best results, use a palette knife for mixing.
- Test: If you’re a novice, consider testing the mixture first to find the right texture. Apply the mix to a scrap canvas and evaluate the look and feel when it dries.
- Paint: Once the paint reaches your desired consistency and texture, start painting! Remember, the drying process might be faster with the addition of the gel, so plan to paint promptly after mixing.
Whether you’re aiming for the granular effect of a sandy beach or the roughness of a rock, textured gels can help you achieve that. Now let’s transition to the next section where we’ll explore an economical alternative to thicken your acrylic paint.
Creating a Homemade Cornstarch Thickener
For artists on a budget or those who love a good DIY challenge, making a homemade thickener can be a cost-effective and rewarding alternative. One popular method involves using cornstarch, a common household item.
Why Use a Cornstarch Thickener?
Cornstarch, a fine white powder derived from the endosperm of corn, is renowned for its thickening properties. Here’s why it makes a great thickener for acrylic paint:
- Accessibility: Cornstarch is a staple in most kitchens, making it an easily accessible thickening agent.
- Affordability: Compared to specialized gels, cornstarch is a more cost-effective solution.
- Efficiency: Cornstarch efficiently thickens the paint without altering its color or finish.
Preparing Your Cornstarch Thickener: Step-by-Step Guide
Making a cornstarch thickener is a straightforward process:
- Mix: Combine 2 cups (470 mL) of water with 3 tablespoons (14.3 g) of cornstarch in a bowl, stirring until the cornstarch dissolves.
- Boil: Transfer the mixture to a saucepan and heat it over low heat, stirring occasionally. As the mixture starts to boil, it will thicken into a paste. Stir more frequently at this point.
- Cool: Once it becomes a thick paste, remove it from the heat and allow it to cool before using it with your paint.
Adding the Cornstarch Paste to Your Paint: Step-by-Step Guide
Here’s how to incorporate your homemade cornstarch thickener into your acrylic paint:
- Prepare Your Paint: As before, start by spreading out the paint on a palette or dish.
- Add the Paste: Use the edge of your palette knife to scoop out some of the cornstarch paste. Add it to the paint.
- Mix: Stir the paste into the paint, checking the consistency as you go. If you prefer a thicker texture, add more paste.
- Experiment: Especially if you’re new to this, experiment with different amounts of paste to find the consistency that suits you best. Consider applying a test strip on a canvas and observe the result when it dries.
- Paint: Once you’re satisfied with the consistency, it’s time to unleash your creativity and start painting!
In the next section, we will delve into some practical tips and tricks to consider when thickening your acrylic paint.
Tips and Tricks for Thickening Acrylic Paint
Thickening acrylic paint is more art than science, and it often involves a good bit of trial and error. Here are some tips and tricks to guide you through the process and help you achieve the best results.
Achieving the Right Gel-to-Paint Ratio
When adding a thickening agent to your paint, it’s crucial to get the ratio right. Here’s a general guide to help you:
| Paint Type | Thickening Agent | Suggested Ratio |
|---|---|---|
| Acrylic Paint | Specialized Thickening Gel | 1 part gel to 4 parts paint |
| Acrylic Paint | Textured Gel | 1 part gel to 4 parts paint |
| Acrylic Paint | Cornstarch Paste | Adjust according to desired thickness |
These ratios are just starting points; feel free to adjust them based on your desired paint texture. Just remember not to exceed a 1:4 ratio when using gels to avoid making the paint unstable.
Ensuring a Uniform Consistency
Ensuring a uniform consistency is key to achieving a smooth and professional finish. Here’s how:
- Mix Thoroughly: Stir your paint and thickening agent until they’re fully blended. Whether you’re using a brush, palette knife, or mixing stick, be sure to scrape around the sides and bottom of your mixing container to incorporate all of the thickening agent.
- Check Consistency: After mixing, draw your mixing tool up and let the paint run off it. It should flow smoothly and have a uniform texture. If you see clumps or if the paint breaks while falling, you might need to mix a bit more.
- Adjust as Needed: If the paint is too thick, add a bit more paint. If it’s too thin, add more thickening agent.
Adjusting Drying Time When Using Thickening Agents
It’s worth noting that thickening agents, particularly gels, often make acrylic paint dry faster. This is something to bear in mind as you plan your work. Here are a couple of tips to help you manage the drying time:
- Work Efficiently: Start painting immediately after adding your thickening agent to make the most of the paint’s workable time.
- Use a Retarder: If you need more time to work with your paint, consider using a retarder, a type of additive that slows down the drying time of acrylics.
Remember, the best way to master the art of thickening acrylic paint is through practice. So don’t be afraid to experiment, make mistakes, and learn from them!
Conclusion
As we wrap up, let’s take a moment to compare the different methods of thickening acrylic paint and offer some final thoughts on this artistic process.
Comparing Thickening Methods: Pros and Cons
Each of the thickening methods we’ve discussed has its own set of advantages and disadvantages. The table below summarizes these to help you decide which method might suit your needs best:
| Thickening Method | Pros | Cons |
|---|---|---|
| Specialized Thickening Gel | Easy to use, specifically designed for acrylic paint, provides consistent results | Can be expensive, may speed up drying time |
| Textured Gel | Adds texture to paint, available in a variety of types (stucco, modeling paste, etc.) | May alter the final look and feel of the artwork, can be expensive |
| Cornstarch Thickener | Inexpensive, easy to make at home | Not as durable as commercial gels, may require more effort to achieve desired consistency |
Final Thoughts on the Art of Thickening Acrylic Paint
Thickening acrylic paint can greatly enhance the texture and depth of your artwork. Whether you choose to use a specialized gel, a textured gel, or a homemade cornstarch thickener, the key is to experiment and find what works best for you.
Remember, the beauty of art lies in its diversity and the freedom it offers for personal expression. Don’t be afraid to play with different materials and techniques. After all, every great artist was once a beginner who wasn’t afraid to make a mess and learn from it.
Here’s to your artistic journey—may it be filled with creativity, exploration, and most importantly, fun!
Frequently Asked Questions
We’ve covered a lot about thickening acrylic paint in this guide, and you might still have a few more questions. This FAQ section aims to address some additional common queries that weren’t covered in the main sections of the article. If you’re still curious about certain aspects of thickening acrylic paint, you might find the answers right here.
Does acrylic paint thicken over time?
Yes, acrylic paint can thicken over time, especially if the paint tube or bottle is not sealed properly. Exposure to air can cause the water in the paint to evaporate, leading to a thicker consistency. However, thickened paint might also be an indication that the paint is starting to dry out and may not perform as well as when it was fresh.
Can I use homemade thickeners for other types of paint apart from acrylic?
While homemade thickeners like the cornstarch gel can be used with acrylic paint, their compatibility with other types of paint can vary. It is always recommended to test a small amount first to see if the homemade thickener works well with the specific type of paint you’re using.
What is the shelf-life of a cornstarch thickener?
Homemade cornstarch thickeners, when stored properly in a cool, dry place and in a well-sealed container, can last for a few weeks. However, it’s best to make it in small batches that you’ll use within a short period of time to ensure its effectiveness.
Can I still use acrylic paint that has hardened or thickened in the tube?
If the acrylic paint has hardened in the tube, it has likely dried out and may not be usable anymore. However, if it has only thickened but is still pliable, you can try adding a bit of acrylic medium or water to it to improve its consistency. But do this sparingly as too much can alter the quality of the paint.
Are there alternatives to cornstarch for making a homemade paint thickener?
Yes, there are alternatives to cornstarch for making a homemade paint thickener. Other household items like flour or glue can also be used to thicken paint. However, it’s important to remember that the results may vary and these items can affect the finish and drying time of the paint. It’s always best to experiment with a small amount of paint first.






Leave a Reply