Enamel paints are renowned for their long-lasting, glossy finish. For years, enamel paints have undergone an incredible evolution. However, if you are looking for a more efficient way to apply enamel paint than the traditional brush, consider investing in an air-powered spray gun as your painting tool. When thinning enamel paint, the question always arises: how to thin enamel paint for a brush?
Furthermore, for those unfamiliar with enamel paints, we will provide a comprehensive overview of what they are and further equip you with valuable information to make the most of this subject.
What Is Enamel Paint?
Enamel paints are oil-based paints that have been the go-to for a durable and glossy finish that hardens with air drying. You can also find water-based paint, which is equally compelling today.
With a wide range of colors and textures, this oil-based paint can give your painting projects the unique look you desire. There’s something for every style, from semi-gloss, gloss, high gloss, and satin to eggshell options.
Why Thin Your Enamel Paint?
To put it plainly, the outcome of using this type of paint is a complex and shiny finish once the paint dries. It is precisely constructed with specific components or elements to attain this outcome. If you don’t thin your paint to the correct consistency, it can wreak havoc on your airbrush or cause other issues.
Thinning enamel airbrush paint ensures a silky, evenly dispersed application. Through trial and error, we’ve discovered that to achieve a smooth spray finish; the paint must be thinned until it has a consistency similar to that of milk. This will ensure that you can spray with minimal difficulty. To achieve the desired pattern and texture, you should consider thinning enamel paint according to specific instructions for your airbrush. Moreover, viewing all the prerequisites for a particular airbrush is essential.
Before beginning any project with a spray gun, we highly suggest testing your equipment beforehand. To do so, spray paint onto an old piece of fabric. This will help you determine whether the settings are working correctly or not. Make sure to mix the paint in small cups for optimal outcomes.
Uses Of Enamel Paint
You can use enamel paint from home appliances to furniture, doors, and stairs in every area of your house – including bathrooms and kitchens. There’s no limit regarding the creative possibilities with this paint.
From wood to glass, metal to concrete, and ceramic – the versatility of enamel paint knows no bounds. You can apply it on different surface materials.
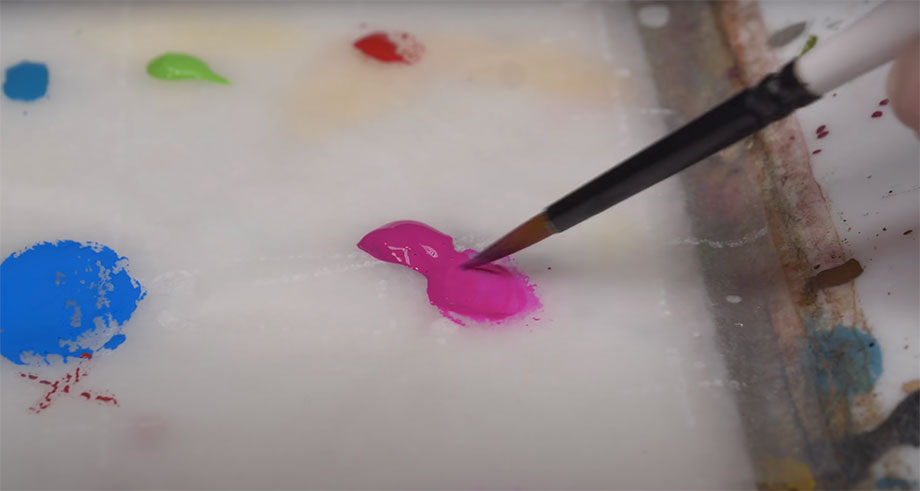
Benefits Of Enamel Paint
Aside from its vast variety of applications, enamel paint also offers many other benefits, including:
- Impressive resilience against humidity and moisture
- Temperature fluctuations do not affect this product.
- Remarkable resistance to corrosion and rust
- Frequent washing is accessible.
- Ease of application
- It offers a consistent finish, creating an even and polished look
How To Thin Enamel Paint – Different Methods To Consider
To help ensure a successful painting job with spray guns, please consider these methods to ensure the paint is thinned correctly. This way, you can confidently apply your desired coat without creating an unnecessary mess.
Thinning Enamel Paint With Mineral Spirits
The experts frequently use T-111 paint thinner. It’s ideal for thinning enamel and brushing the surface before putting on paint. You will notice a slightly tacky surface and fewer brush marks using mineral spirits. Plus, it dries quickly and offers a crystal-clear finish.
When tackling massive projects, it’s suggested to use the quart-size option. This way, you can fill a gallon and bring it to your job site. If T-111 is preferred, use three parts paint per 1 part thinner. However, this may not require diluting since stirring will sufficiently dissolve any lumps in the mixture.
Thin Enamel Paint using Acetone
Acetone is another option if you’re looking to thin out your enamel paint. You can do this in two ways:
-
- Use a container and fill it with sufficient Acetone so the enamel paint can be submerged. Allow the color to settle for 2-3 days. Upon your return, you’ll notice a beautiful glossy sheen, and the enamel will turn thinner.
- Slowly blend Acetone with enamel paint until you have achieved your desired outcome for a smooth, even consistency.
Add Turpentine For Thinning Paint.
Diluting enamel paint with the right kind of turpentine is possible. Select which type of turpentine to use depending on your chosen color.
When applying enamel paint, the finest turpentine should be used. However, mineral spirits or turpentine will suffice when using standard colors.
You can create a much richer, translucent coat with an exceptionally smooth finish using turpentine.
Take a brush and pour some turpentine into an individual container for optimal results. Subsequently, dip your brush into the paint after dipping it into the turpentine.
For the best outcome, use a thin layer of paint. If you require additional coats, allow the first one to dry and cure before sanding it down and applying another coat.
Use Lacquer Thinner
Add one teaspoon of lacquer thinner to your application to attain the perfect consistency. Subsequently, add solvent gradually until you achieve your desired results.
You can add a few drops of lacquer thinner and mix them in. While this will make working easier, the quality and coverage won’t be sacrificed.
Using Water To Thin Enamel Paints
If you need a glossy shine for your project, lacquer with enamel paint is ideal. To achieve optimal results, add water to thin it out.
Achieve an excellent finish by mixing three parts of enamel paint and lacquer with one piece of water.
To achieve an elegant matte finish for doors, cabinets, and furniture, use the right amount of water – not too much.
How To Properly Thin Enamel Paint For Sprayer?
Now, let’s cover a step-by-step process for thinning paint for spray guns. Please follow each step carefully to achieve optimal results.
Look After Your Safety
Before you start, you must take the necessary precautions to protect yourself. Many paints contain hazardous chemicals that can prove detrimental when inhaled – headaches, nausea, and skin irritation are possible side effects. Wearing protective goggles, a face mask, and clothing while working is mandatory to ensure safety.
Identify The Type Of Paint
Before the thinning process, it is essential to understand what kind of enamel paint it is. Enamel paints are generally divided into two main categories: oil-based paints and water-based paints.
To execute the thinning process correctly, first ascertain whether your enamel paint is oil-based or water-based. After that, research what type of enamel thinners work best with your color and the ideal paint ratio to mix it in. With this simple step, you can ensure that everything will go smoothly.
Properly Mix And Stir Your Paint To Achieve The Right Thickness
Before the thinning process starts, it’s crucial to stir your paint so that its consistency is optimal thoroughly. Start mixing and stirring the color until you achieve the desired result. Then you can begin to thin the paint.
To get started, take an empty bucket and pour the paint into it. For optimal results, utilize a paint strainer while showering to remove any lumps or impurities in the canister.
Begin Thinning Paint
After successfully blending the paint and ensuring it’s free of clumps, thin out the mixture. Mix in the correct amount of paint thinner, depending on the paint type.
To ensure you don’t create a mess, start with the suggested ratio of 1 part thinner to 3 parts paint. The mixing ratio depends on the paint type and the lighter used.
Testing Process
Utilizing the proper ratio of paint and thinner is essential. However, you must also test the thinned paint to confirm adhesion capabilities and ensure desired consistency post-application. Doing this will guarantee a fine glass-like finish in the end.
When the paint disperses evenly on the test surface and effortlessly from the spray gun, you can be sure your thinning process succeeded. Now, it’s time to start painting the exterior with some beautiful colors.
If your paint doesn’t spray evenly, consider increasing the thinner ratio. The ideal mix is 1 part more delicate than two parts color. So keep thinning until you hit that combination. Once you do, go through a test again to ensure consistent results each time.
Choose A Spraying Pattern
After completing all the necessary steps, inspect the spray pattern and technique to paint the area. Ensure it is suitable for your desired outcome. Please spend a few seconds to ensure it sprays evenly.
FAQs – Frequently Asked Questions
How Much Should Water Be Mixed With Enamel Paint?
Applying too much water to enamels can cause them to slide and become unmanageable, so take special care not to use more than a minimal amount. On the contrary, you don’t want to add too little water as it may take too long to dry and harden. Blend 5oz of color with 1 oz of water to obtain the perfect consistency for your enamel paint. This ratio ensures the mixture isn’t too thin or thick and offers a smooth finish.
What Is The Correct Ratio For Mixing Thinner With Enamel Paint?
An optimal ratio of 3:1 or 4:1 between the paint and a thinner should ensure that the finished product is neither too thick nor too dark.
What Is The Best Method To Thin Oil-Based Enamel Paint?
If you’re looking for oil-based spray guns, turpentine, white spirits, and paint thinner are the perfect mediums. The optimal ratio is three parts of paint mixed with one part thinner. However, remember that not all colors react the same way when thinned or applied by air spray.
Is It Necessary To Thin Enamel Paint?
Semi-gloss enamel paints provide a flawless finish when applied with either brushes or rollers. However, thinning the color out slightly is recommended if you wish to use a spray gun for the best results.
How To Thin Enamel Paint For Brush?
Adding water to paint may seem like a simple solution. However, it causes the paint to dry out quickly. An alternative option is adding a bit of alcohol which will help thin the enamel paint without difficulty. To achieve optimal results, combine two parts of enamel and two parts thinner. Mixing these two ingredients will provide an ideal combination for use.
Conclusion
Here we have the ultimate manual that will provide all the answers you’ve been searching for. If you want to learn how to effectively thin enamel paint without making any mess, this step-by-step guide is the perfect place for you. It will provide all the information necessary to get started and help remove some confusion from the process. Before beginning the thinning, read its label first. The subsequent steps can then be easily found here.





Leave a Reply