As an artist, you might have marveled at the beautiful, soft hues of pastel pencils and the magic they bring to your artwork. In this article, we’ll explore the world of pastel pencils, their uses in art, and more importantly, how to sharpen pastel pencils correctly to maintain their quality and performance.
Pastel pencils are a versatile medium, combining the ease of use of traditional pencils with the vibrant colors and blendability of pastels. They offer the perfect balance for artists who want to create intricate details, delicate shading, or bold, sweeping strokes. However, to truly harness their potential and ensure they last, it’s crucial to know how to sharpen pastel pencils properly.

Sharpening pastel pencils correctly is not just about maintaining their pristine appearance, but also about preserving their functionality. A well-sharpened pastel pencil will glide smoothly across the paper, producing crisp lines and seamless blending, while a poorly sharpened one can cause crumbling or uneven application of color.
In the following sections, we will dive into the nuances of sharpening pastel pencils and provide step-by-step guidance to help you get the best results from your artistic tools. So, grab your pastel pencils and let’s embark on this colorful journey together!
Choosing the Right Sharpener for Pastel Pencils
To ensure you get the best out of your pastel pencils, it’s essential to choose the right sharpener. The type of sharpener you use can significantly impact the quality of your artwork and the longevity of your pencils. In this section, we will discuss the importance of selecting the best sharpener for pastel pencils and compare various types of sharpeners, including handheld, electric, and sandpaper blocks.
Why Choosing the Right Sharpener Matters
Pastel pencils are more delicate than regular graphite pencils, which means they require special care when sharpening. Using the wrong sharpener can damage the pencil, cause the pastel core to break or crumble, or even ruin the pencil’s overall performance. A suitable sharpener will help maintain the integrity of the pastel core and ensure the pencil remains effective and enjoyable to use.
Types of Sharpeners and Their Pros and Cons
Handheld sharpeners
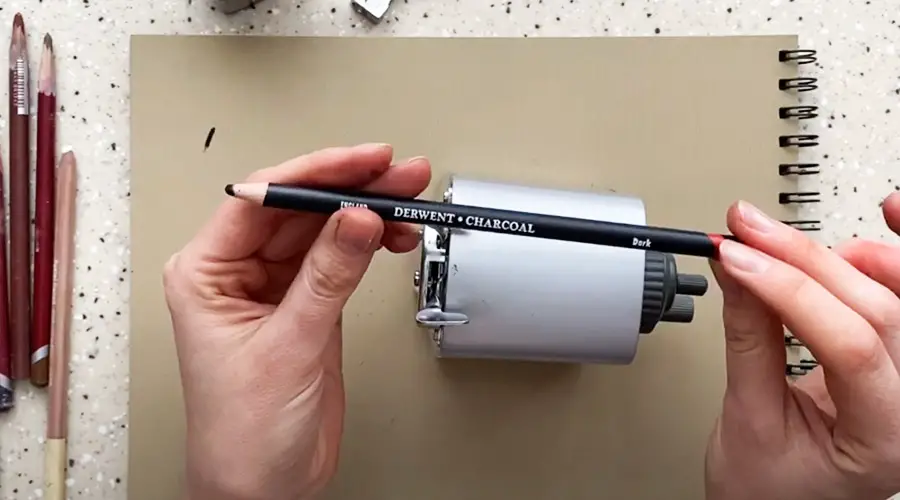
These are the most common and budget-friendly option. Some handheld sharpeners are specifically designed for pastel pencils, featuring larger openings and sharp blades that minimize the risk of breaking the pencil. Look for a sharpener with a gentle grip and a clean shaving reservoir to avoid cross-contamination of colors.
- Pros: Affordable, portable, and easy to use.
- Cons: May require more effort and skill to achieve the perfect point, can cause breakage if not used gently.
Electric sharpeners
These sharpeners offer a more effortless and precise sharpening experience. Some electric sharpeners have adjustable settings, allowing you to choose the optimal sharpness for your pastel pencils. However, be cautious when using an electric sharpener, as it can be more aggressive and may damage delicate pastel cores if not used properly.
- Pros: Fast and efficient, provides consistent results.
- Cons: Can be expensive, may damage pencils if not used with care.
Sandpaper blocks
Sandpaper blocks are an excellent alternative to traditional sharpeners. They allow you to sharpen your pastel pencils by gently rubbing the pencil tip against the abrasive surface. This method provides greater control and minimizes the risk of breakage.
- Pros: Affordable, provides excellent control, reduces the risk of breakage.
- Cons: Can be time-consuming, may require frequent replacement of sandpaper.
Best Sharpener For Pastel Pencils
-
- Derwent Pastel Pencil Sharpener: This handheld sharpener is specifically designed for pastel pencils, featuring a larger opening and a gentle grip to prevent breakage.
- Faber-Castell Grip Trio Pencil Sharpener: This versatile sharpener accommodates pastel pencils, providing a gentle and precise sharpening experience.
- Alvin Rotary Lead Pointer: This rotary sharpener is suitable for larger diameter pencils, including pastel pencils, and allows you to achieve a perfectly sharpened point.
In conclusion, selecting the right sharpener for your pastel pencils is a crucial step in maintaining their quality and performance. By considering the pros and cons of each type and choosing a sharpener designed specifically for pastel pencils, you can ensure your tools remain in top shape, ready to create stunning artwork.
Sharpening Techniques for Pastel Pencils
Having chosen the right sharpener for your pastel pencils, it’s time to learn the proper techniques for sharpening them. In this section, we will explain how to sharpen pastel pencils using a handheld sharpener, electric sharpener, and sandpaper block, along with tips for avoiding breakage and ensuring optimal results.
Sharpening Pastel Pencils with a Handheld Sharpener
- Start by holding the pencil gently but firmly. Avoid applying too much pressure, as this can cause the delicate pastel core to break.
- Insert the pencil into the sharpener, making sure it’s aligned with the larger opening designed for pastel pencils.
- Rotate the pencil clockwise, taking care not to twist it too vigorously. Gradually shave off the wood casing until the desired point is achieved.
- Empty the shavings reservoir regularly to prevent cross-contamination of colors and ensure the sharpener remains effective.
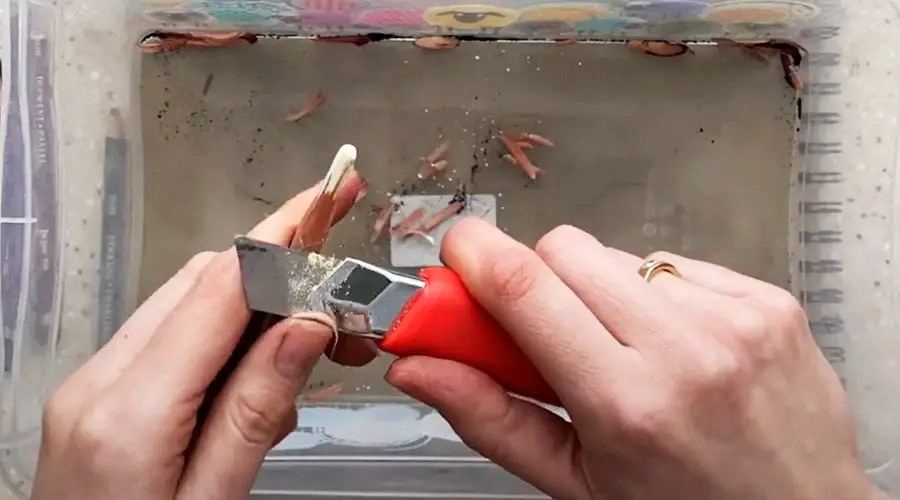
Tips to avoid breakage:
- Use a light touch when sharpening.
- Keep the pencil and sharpener clean to reduce friction.
- Make sure the sharpener’s blades are sharp and in good condition.
Sharpening Pastel Pencils with an Electric Sharpener
Advantages: Electric sharpeners offer a quick and efficient sharpening experience, often providing consistent results. Disadvantages: They can be expensive and might damage pastel pencils if not used with care.
Tips for proper use:
- Choose an electric sharpener with adjustable settings to accommodate pastel pencils.
- Insert the pencil gently into the sharpener, ensuring it’s properly aligned.
- Hold the pencil lightly and let the sharpener do the work. Avoid applying excessive pressure.
- Check the pencil frequently to prevent over-sharpening and breakage.
Sharpening Pastel Pencils with a Sandpaper Block
Step-by-step instructions:
- Hold the pastel pencil in one hand and the sandpaper block in the other.
- Gently rub the pencil’s tip against the sandpaper, using a circular motion to remove the wood casing and expose the pastel core.
- Continue sharpening until you achieve the desired point, frequently rotating the pencil to ensure even sharpening.
- Replace the sandpaper when it becomes worn to maintain effective sharpening.
When to use this method: Sandpaper blocks are ideal for artists who prefer a more controlled sharpening method or when traditional sharpeners are unavailable. They are also useful for refining the point of an already-sharpened pastel pencil.
By understanding and practicing these sharpening techniques, you can preserve the quality and performance of your pastel pencils, allowing you to create stunning artwork with ease.
How to Sharpen Oil Pastels
Before delving into the techniques for sharpening oil pastels, let’s briefly discuss the differences between oil pastels and pastel pencils. Understanding these differences is essential, as it will help you choose the appropriate sharpening method for each medium.
Differences Between Oil Pastels and Pastel Pencils
Oil pastels and pastel pencils are both popular coloring mediums, but they have distinct characteristics that set them apart:
- Composition: Pastel pencils have a dry, chalk-like core made of pigment, binder, and filler. In contrast, oil pastels have a softer, buttery consistency due to the inclusion of oil and wax in their composition.
- Form: Pastel pencils are encased in wood, much like traditional pencils, while oil pastels come in a crayon-like form, without any casing.
- Application: Pastel pencils allow for more precision and control, making them suitable for detailed work. Oil pastels are generally used for broader strokes and bolder applications of color.
- Blendability: Both mediums can be blended, but oil pastels have a creamier texture, which makes them more suited for techniques like impasto and sgraffito.
Sharpening Techniques for Oil Pastels
Unlike pastel pencils, oil pastels do not require traditional sharpeners due to their crayon-like form. Instead, you can use the following techniques to create a sharp point or refine the shape of your oil pastels:
- Hand-sharpening: Gently pinch the oil pastel between your fingers and use a scraping motion to remove the outer layer of color, revealing a sharper point. Be cautious not to apply too much pressure, as this can cause the pastel to break or become misshapen.
- Sculpting with a knife: Carefully use a craft or palette knife to trim away the excess pastel material, gradually shaping the oil pastel into a sharper point. This method requires precision and caution to avoid damaging the pastel or injuring yourself.
- Sandpaper or sanding block: Hold the oil pastel and gently rub the tip against the sandpaper or sanding block, using a circular motion. Continue to sharpen until the desired point is achieved. This method provides more control and is particularly useful for refining the shape of an oil pastel that has become blunt or uneven.
- Paper towel or cloth: Wrap a paper towel or soft cloth tightly around the tip of the oil pastel and gently twist, applying pressure to create a sharper point. This method is effective for minor sharpening and can help maintain the desired shape during use.
By utilizing these techniques, you can keep your oil pastels in optimal condition, allowing you to create vibrant and expressive artwork with ease.
Preventing Lead Breakage While Sharpening
Pastel pencils, with their delicate composition, can be prone to breakage if not handled correctly during sharpening. To preserve your pencils and prevent frustration, follow these tips for handling pastel pencils gently and sharpening them without breaking the lead:
- Use a light touch: When sharpening pastel pencils, avoid applying excessive pressure or force. Hold the pencil gently but firmly, allowing the sharpener to do the work. Using a light touch minimizes the risk of damaging the pastel core.
- Rotate the pencil, not the sharpener: When using a handheld sharpener, it’s best to rotate the pencil rather than the sharpener. This technique provides greater control and stability, reducing the likelihood of breakage.
- Choose the right sharpener: As mentioned earlier, it’s crucial to select a sharpener specifically designed for pastel pencils. These sharpeners often have larger openings, sharp blades, and gentle grips, which help minimize breakage during sharpening.
- Keep your sharpener clean: A clean sharpener reduces friction and allows for smoother sharpening. Regularly empty the shavings reservoir and use a small brush or cotton swab to remove any debris from the blades.
- Maintain sharp blades: Dull blades can cause the pastel core to crumble or break. Ensure your sharpener’s blades are sharp and in good condition, replacing them as necessary.
- Avoid dropping your pencils: Dropping pastel pencils can cause internal fractures in the pastel core, which can lead to breakage during sharpening. Handle your pencils with care and store them in a protective case when not in use.
- Sharpen at the right angle: Hold the pencil at a slight angle when inserting it into the sharpener. This position allows for more even sharpening and reduces the chances of the pastel core breaking.
- Avoid over-sharpening: Sharpen your pastel pencils just enough to achieve the desired point, as over-sharpening can weaken the pastel core and make it more susceptible to breakage.
- Warm up your pencils: If you live in a colder climate, your pastel pencils may become more brittle. Before sharpening, try warming them up gently by holding them in your hand for a few minutes or placing them in a warmer area to help prevent breakage.
By following these tips and handling your pastel pencils with care, you can prevent lead breakage and ensure that your artistic tools remain in top condition for creating stunning artwork.
How to Sharpen Your Pencil Without a Sharpener
There may be times when you find yourself without a sharpener, but you still need to sharpen your pastel pencils. In such situations, some creative methods can help you achieve a sharp point. However, be mindful of safety considerations when using these alternative techniques:
Using a knife or craft blade
Carefully hold the pastel pencil in one hand and a knife or craft blade in the other. Gently shave off the wood casing around the pastel core to expose the tip. Rotate the pencil as you go, ensuring even sharpening. This method requires a steady hand and extreme caution to avoid injury.
Safety considerations: Always cut away from your body and fingers, and use a sharp, clean blade to reduce the risk of slipping or accidents. Work on a stable surface and, if possible, use a cutting mat for added safety.
Sandpaper or sanding block
As previously mentioned, sandpaper or a sanding block can be an effective way to sharpen pastel pencils. Gently rub the tip of the pencil against the abrasive surface using a circular motion, gradually exposing the pastel core and achieving the desired point.
Safety considerations: Use a fine-grit sandpaper (around 400 to 600 grit) to minimize damage to the pastel core. Avoid breathing in any dust generated by the sanding process, and consider wearing a mask if necessary.
Nail file or emery board
In the absence of sandpaper or a sanding block, a nail file or emery board can serve as a makeshift sharpening tool. Gently rub the pastel pencil tip against the nail file, rotating the pencil as you go, until the desired point is achieved.
Safety considerations: Opt for a finer-grit nail file to prevent damage to the pastel core, and be cautious not to inhale any dust produced during the process.
Rubbing against rough surfaces
In a pinch, you can sharpen pastel pencils by rubbing them against rough surfaces like brick, concrete, or textured walls. Use gentle pressure and a circular motion to remove the wood casing and expose the pastel core.
Safety considerations: Be cautious not to damage the pastel core by applying too much pressure. Also, be aware of your surroundings and avoid damaging property or creating a mess.
While these alternative methods can be helpful when a sharpener is not available, they should be used with care, and proper safety precautions should be taken. Whenever possible, use a dedicated pastel pencil sharpener to maintain the optimal performance and longevity of your artistic tools.
Conclusion
In conclusion, properly sharpening pastel pencils is essential for maintaining their quality, performance, and longevity. Sharpening your pencils correctly not only ensures precise application and vibrant color, but it also helps prevent lead breakage and frustration during your creative process.
We’ve explored various sharpening methods, including handheld sharpeners, electric sharpeners, sandpaper blocks, and even some creative alternatives for when traditional sharpeners are not available. It’s important to experiment with these different techniques to find the one that works best for you and your artistic style.
As you continue to develop your skills and explore the world of pastel pencils, remember that proper care and maintenance of your tools play a vital role in the success of your artwork. Keep practicing, and don’t be afraid to try new methods or experiment with different sharpening tools to find your perfect fit.
References:
- Jackson’s Art Blog: “How to Sharpen Pastel Pencils” – https://www.jacksonsart.com/
- Caran d’Ache: “Pastel Pencil Sharpening Tips” – https://www.carandache.com/
- Derwent: “Sharpening Pastel Pencils” – https://www.derwentart.us/






Leave a Reply